How to Choose the Best TIFF to PDF Converter
• Filed to: Create PDF
Tag Image File Format or TIFF (TIF) is one format that is used for exchanging raster graphic or bitmap images between different applications such as the ones used for scanning. What I am trying to tell you is that you will find a lot of TIFF files if you have anything to do with dealing with images in your line of business and if you were to ever convert TIFF to PDF document, this article is going to help you do it with PDFelement Pro.
Part 1. The Best TIF to PDF Converter Program
I have reviewed many software and I can now very confidently confirm when I see a real gem out there. Well, PDFelement Pro is the best TIF to PDF converter. TIFF files are also one of those that iSkysoft PDF Editor can convert in to great quality PDF document for you. As icing on the cake, it even allows you to not only add but also edit texts, notes, images, watermarks etc.
How to Create PDF from TIFF on Mac (macOS 10.13 High Sierra Compatible)
Creating PDF document out of a TIFF file on Mac is quite easy when you are using iSkysoft PDF Editor Pro for Mac.
Step 1. Load the TIFF Image You Want to Convert
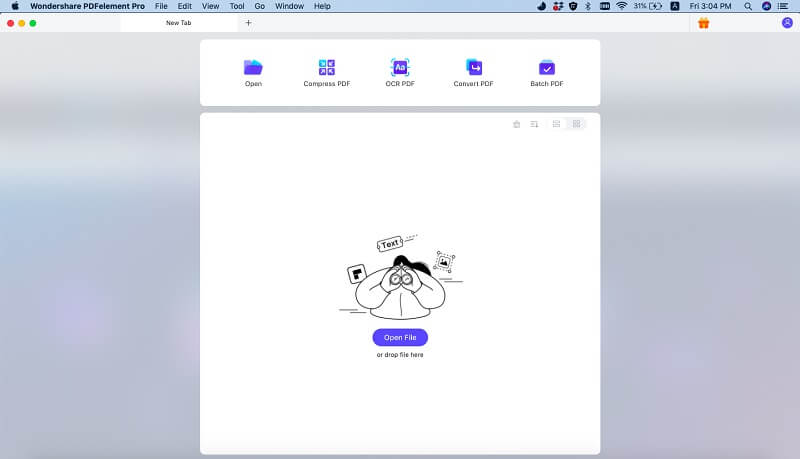
To start, you can launch the program and then click the "Create PDF" option from the main menu. Once you are done selecting the TIFF files you need, go ahead and click the "Open" button and you should see that iSkysoft PDF Editor Pro for Mac will open those TIFF files for you.

Step 2. Modify Your File before Saving (Optional)
Before saving your image as PDF format, you can edit the file according to your needs. To modify the texts and images, you can click the "Edit" button; to annotate it, you can click the "Markup" button on the top toolbar. If you'd like to delete, insert, crop pages, you can navigate to the right side "Pages" menu.

Step 3. Save TIFF as PDF File
As the last step in this process, you have to go to "File > Save As" in order to save the TIFF files as a new PDF document. That's it!

Step 4. Combine Multiple TIFF to PDF
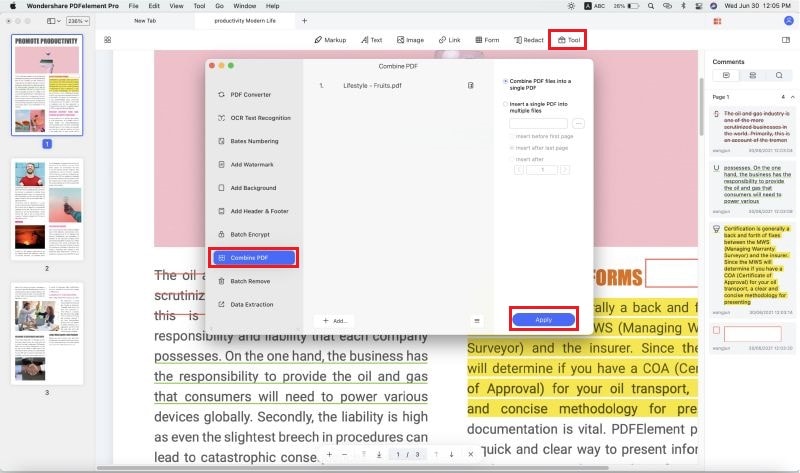
To combine several TIFF files to PDF, you can click on the "Combine PDF" in the main interface, and then add your TIF files by clicking "Add Files". And then click the "Combine" button to merge multiple TIF files to PDF.

How to Change TIFF/TIF to PDF on Windows (Windows 10 Compatible)
Using PDFelement Pro for Windows is very much like the way it has to be done on Mac. Once you have downloaded and installed the Windows version of PDFelement Pro on your computer, just follow the steps as given below and you should do just fine.
Step 1. Add Images File to the Program
Launch PDFelement Pro for Windows and choose "Create PDF" option as shown in the primary window. In the next window that pops up, look for the TIFF file that you want converted and select it or highlight it. After that, click on the button "Open".

Step 2. Modify Your File (Optional)
If you'd like to make some changes on your file, you can go to the "Edit" tab to activate the PDF editing mode. You can also navigate to the "Comment" tab to get the options for marking up your file.

Step 3. Converting TIF to PDF
Now, go to the tab "File" and choose the "Save As" option so as to save your TIFF file as a PDF document. Specify the name for this new PDF document and the location where you would like to save it on the next popup window. Now, click on the button "Save". When done, you can go to the location you had specified and open the new PDF document.
Why Choose PDFelement Pro as the Best TIF to PDF Converter
PDFelement Pro is one of the best software till date when it comes to editing, converting or creating PDF documents and it allows you to convert a large number of file types in to PDF documents such as JPG, PNG, PPT, DOC and many more. With the built-in OCR function, you can easily convert and edit scanned PDF documents with ease.
Why Choose This PDF Editor:
- Create PDF from images like TIFF, PNG, BMP, JPG and more.
- Convert PDF to Microsoft Office format, images, and other formats.
- Help you edit PDF files easily with powerfuly editing tools.
- Edit and convert scanned PDF files with the OCR feature.
- Easily markup, comment and annotate PDF files.

Part 2. How to Convert TIFF to PDF Online for Free
For portability and convenience reason it is essential to convert the TIFF files to PDF. While many software available for the purpose, the same task can be done on the go with the help of online tools. So, let’s take a look at some of the tools available online to help you out with the task.
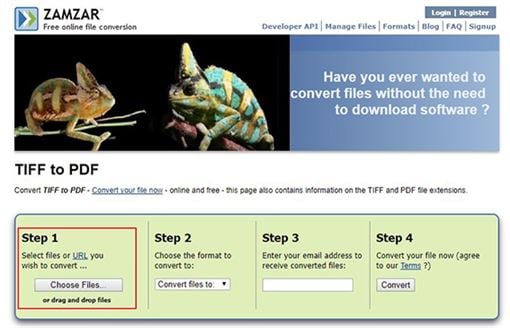
To learn in detail about how this online converter works, we will discuss in step-by-step procedure about one of the famous online tool Zmzar.com. The site is famous for its versatile converting facility which not only converts documents but also helps to convert image formats and audio formats. So let’s take a look on how to convert the file using the online tool.
- Step 1. Upload: As soon as you launch the website you will meet with a simple interface with instructions written on it. In the first step, upload the required tiff document by clicking on the choose file button or by writing the URL from where you want to extract the file

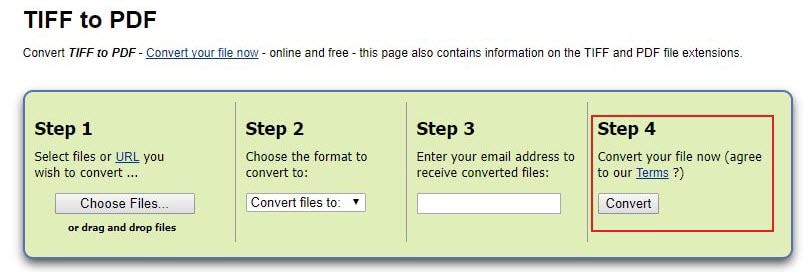
- Step 2. Convert TIFF to PDF online: Select the format of the desired exported file. In this case pdf as output format. Then enter your email id in the box given so that you can receive the converted file once the process is done. Now click on the convert button and relax till the process completes.

Limitations of the online TIFF to PDF converter
- You will need an internet connection throughout the process.
- All the sites do not feature batch file conversion.
- The open source engines are relatively slow.
- 5. Ads and pop-ups may affect your internet speed and hence delay the conversion.


Ivan Cook
chief Editor