How to Add JPG to PDF on Windows
Every then and now we have been in a situation where we need to add JPG to PDF or need to insert JPG into PDF files. Adding JPG to the PDF files such as charts, graphs, logos, and another sort of JPG is a common requirement. It provides a detailed understanding of the PDF file and also makes it look more informative. Luckily with PDFelement Pro you can add JPG into PDF file flawlessly.
- Method 1: Add JPG to PDF with Edit Function
- Method 2: Drag to Add JPG to PDF
- Method 3: Add JPG to PDF Online
PDFelement is a versatile editor that offers more than one way to insert JPG into PDF. In this article, we have explained two different methods along with the steps to add JPG to PDF using PDFelement.
Method 1: Add JPG to PDF with Edit Function
The first method you import the required JPG file to PDF directly from the PDFement interface using its versatile feature that allows you to import JPG directly from your computer without having to switch between the PDFelement and computer to locate and select the JPG.
Step 1: Open a PDF
Launch the PDFelement that you have installed on your computer. Open it and on the home page, click on the “Open files” button. Select the PDF you would like to edit.

Step 2. Add JPG to PDF
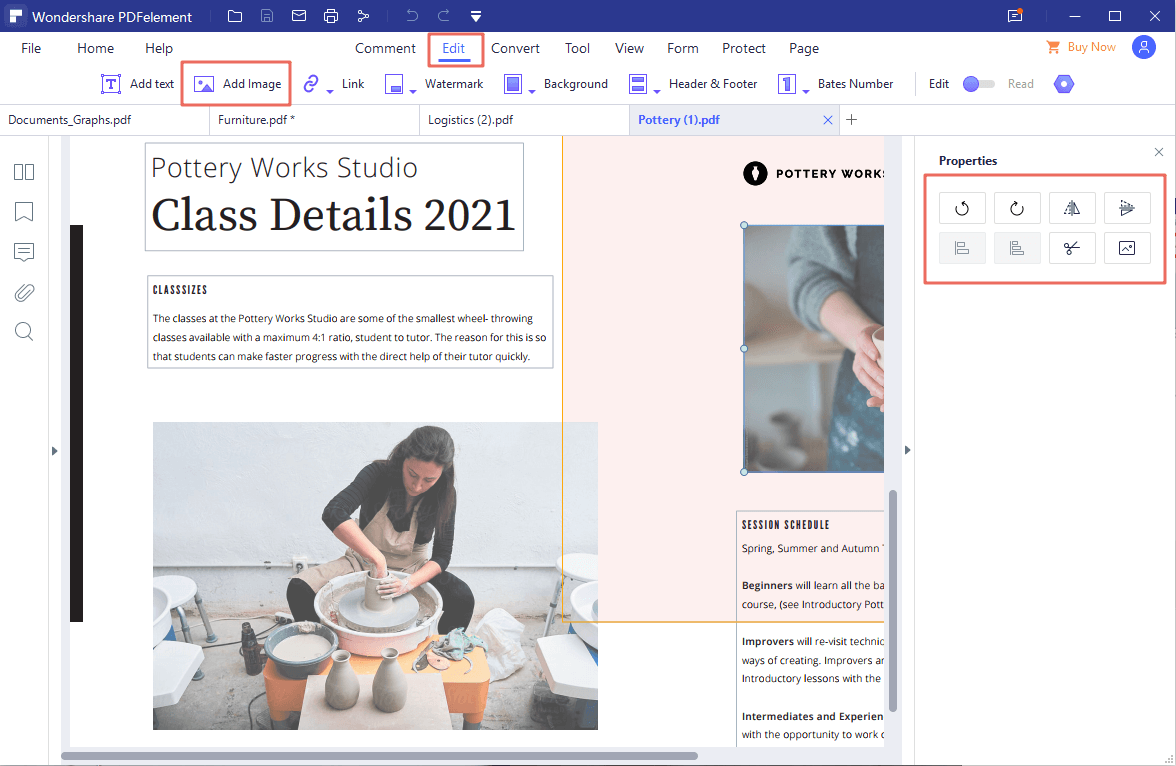
Once the PDF is open on the PDFelement, select the Edit tab from the top menu. Now simply click on the “Add Image” option and choose the desired JPG that you want to add.

Step 3: Edit the properties of the image
You can edit the properties of the added JPG, right-click and select properties. The properties panel will open up on the right side; you can rotate, overturn or align the JPG accordingly.

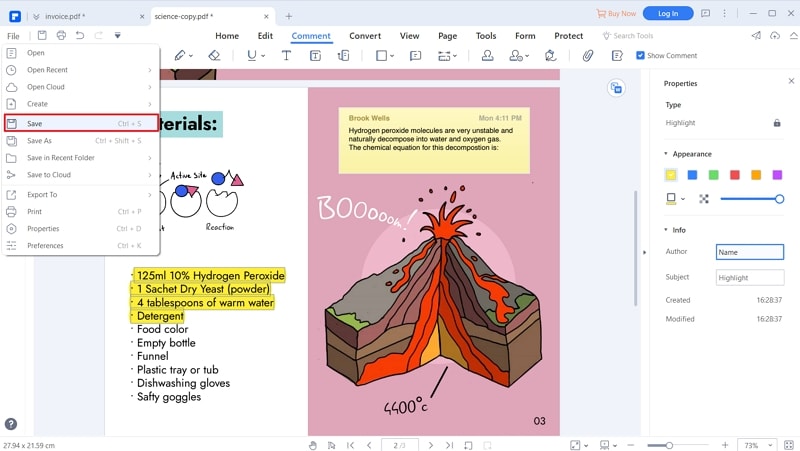
Next, click on the “Save” button from file menu or directly save from top most menu panel to save the changes made on your PDF file. Now, the next time you open the PDF file, you will notice that the image is added to the PDF.
Method 2: Drag to Add JPG to PDF
Another method gives you a more conventional approach to add a JPG image to a PDF by drag and drop it straight from the desktop to the file.
Step 1: Enter Edit Mode
First of all, make sure that the PDF is already open in the PDFelement interface. Enter edit mode to do that click the "Edit" tab from the top and then Toggle the "Edit" tab on the top toolbar and your PDF is in edit mode.
Step 2: Drag JPG to PDF
Save the JPG image of your choice on your desktop. Resize the PDFelement so that you can see the desktop. Drag -and-drop the JPG to the PDF.

Step 3: Select “Add as an Image”
Now choose the “Add as Image” option and the image will be added to the selected location. You can position the JPG anywhere on the PDF document as well as edit the properties of the image.

Step 4: Save PDF file
To save the changes on the PDF, click on the File tab in the top right corner and then click on the “Save” button, or you can use the “Ctrl+S” shortcut to save the file. Now, the JPG will be added to your PDF file.

Method 3: Add JPG to PDF Online
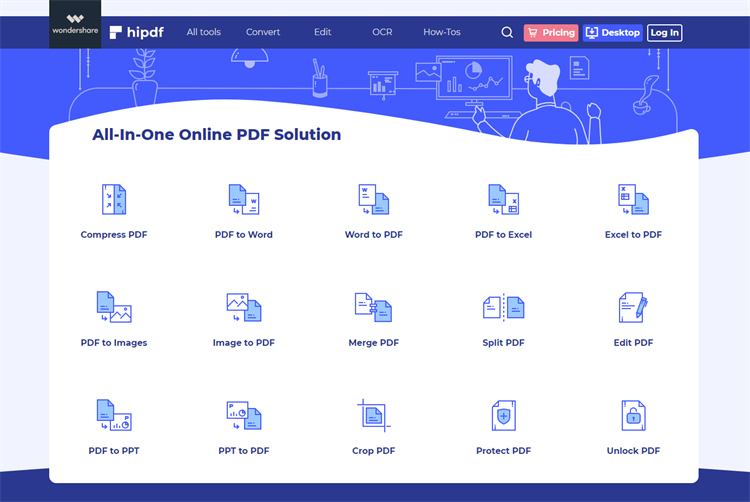
To add JPG to PDF online for free, you need HiPDF, an online PDF editor powered by Wondershare that lets you edit your PDF on your web browser. IT is easy to use and reliable way to manage all your PDF editing requirements without any hassle. This website allows you to upload a PDF, make changes to it, and then save it back to your computer all without even having to make an account.
Add JPG to PDF Online
- First of all, visit the official website of HiPDF and click the "Choose File" button, or you can drag and drop to select the PDF file from your computer.
- Once the PDF is uploaded on the window, click on the "Add Image" button from the toolbar above your PDF.
- The selected JPG will be directly added to the PDF document, you can position, resize it.
- Once you are completed with the editing, click the "Apply" button to apply all the changes to the PDF, Wait for a while till the processing is complete.
- After that click on the Download button to save the edited PDF locally on your computer or save it on Google Drive or share PDF document by mail.


Ivan Cook
chief Editor