Top 3 Ways on How to Rotate Image in PDF without Hassle
If you get a PDF with images in the wrong direction, you can rotate image in PDF with Acrobat Reader but only when you access the PDF file in Acrobat Reader. Every time you close the PDF, you will get the images in wrong direction again. So how to rotate image in PDF and save forever? Luckily, this guide will show you how to rotate PDF image in the easiest way.
Part 1. How to Rotate Image in PDF and Save on PC
The best way to rotate a PDF image on Mac permanently is to use a professional PDF Rotator. I strongly recommend you to use PDFelement Pro, which will edit any PDF file for you in the fastest way possible. The PDF Editor for Mac has a lot of cool features, including the one that allows you to rotate an image permanently.
Easy Steps to Rotate an Image in PDF on Mac
Here is a step by step guide that will show you how to use PDFelement Pro for Mac (macOS 10.13 High Sierra) to change the position of a PDF image.
Step 1. Import PDF File to the Program
Launch the application. Import the PDF files you want to work with by clicking on the "Open File" button. You can also drag the files into the program. Once the file is open, you are ready to rotate it.
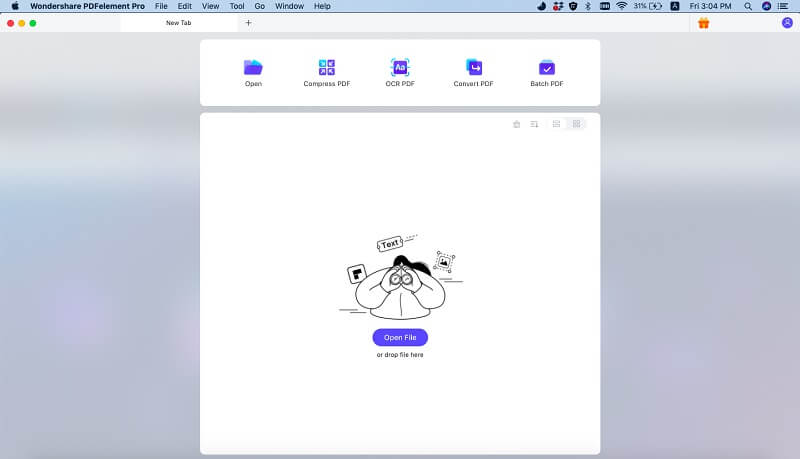
Step 2. Rotate PDF Images 90 Degrees and More
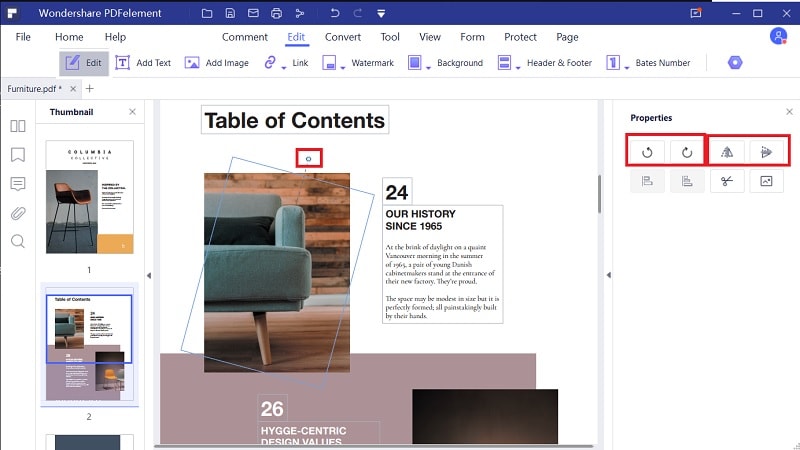
Go to the "Edit" menu on the top toolbar and click the target image in the PDF file. You will see the image is editable, and you can then click the Rotate Right or Rotate Left button to correct the image control pannel. Make sure you save the file when you are done.

PDFelement Pro - The Best Tool to Rotate PDF Images
PDFelement Pro is a powerful PDF editor that not only allows you to rotate an image in PDF files, but also enables you to edit PDF texts, links, pages and other elements with multiple PDF editing tools. The PDF editor will help you to convert PDF files to other file formats such as Word, PPT, Image etc. To save your time, you can also use the batch process feature to convert multiple PDF files.
Why Choose This PDF Editor:
- Easily edit, rotate, crop, extract and insert images in PDF.
- Edit PDF files and add annotate or markup to PDF.
- Convert, create, combine and split PDF in easy way.
- Fill out and create PDF form, export and import data to PDF form.
- The OCR feature helps you to edit and convert scanned PDF.

How to Rotate Images in PDF on Windows
If you want to create, convert, or edit PDF files in Windows, PDFelement Pro for Windows is the program you are looking for. It allows you to rotate PDF images in Windows permanently, in a few clicks. It is a great tool for anybody who deals with PDF files constantly, because it makes it possible to work with the PDF files on a large scale, just as in any other Word processor. You can edit, encrypt, convert, create, annotate, and even markup PDF documents.
Easy Steps for Rotating a PDF Image in Windows
Let's see now how can you rotate PDF images in Windows, using PDFelement Pro for Windows:
Step 1: Launch the PDFelement Pro. Click the "Open File" button and import the PDF document to the program. You can also drag and drop to load the file.
Step 2: Simply go to the "Edit" menu and click on the image. Rotate it as you want. Don't forget to save the document when you are done!
Part 2. How to Rotate PDF Image in Word
Unlike Adobe Acrobat, you can use Microsoft Word to view PDF documents in a more consistent format. Although you cannot directly incorporate your PDF files in Word, you can still convert some pages to a format that is compatible with Word and use the following steps to rotate an image.
1. Converting PDF
a) To convert your PDF file, open the document and navigate through to the page you would like to import into your Word document.
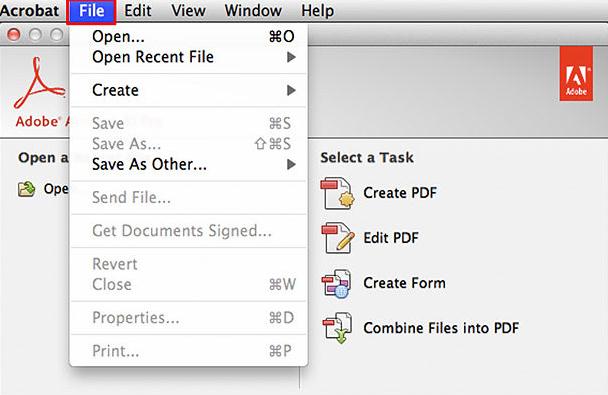
b) From the Acrobat Reader toolbar, click the snapshot icon resembling a camera. If you can’t see this icon, right click on the toolbar to display the "options" menu and click on "snapshot" to add it to your toolbar.
c) Place the cross-shaped snapshot cursor at the upper left corner of the page you wish to copy. Then, press and hold the mouse key, and drag the cursor towards the lower right corner of the section you wish to copy.
d) When you release the key, you will automatically copy that the selected PDF section.
2. Paste and Rotate
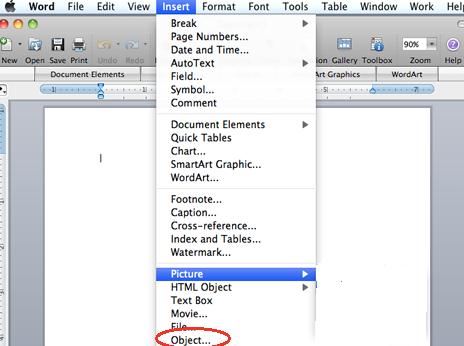
a) Open the Word document where you wish to insert the copied PDF section. Then, click the CTRL and V buttons at the same time to automatically paste the image.
b) To select the image, move the cursor inside the image and click the mouse key.
c) Move the cursor over the tiny green dot displayed outside the middle of the image’s top edge.
d) Click and hold your mouse key to grab this dot (which acts as the image rotation tool).
e) To rotate the image in a counterclockwise direction, move the cursor towards the left, or to the right for a clockwise rotation.
And there you go! You have successfully rotated your PDF image using Word.
Part 3. How to Rotate PDF Image in Powerpoint
Adobe Acrobat usually detects the majority of the text in a presentation. Therefore, resulting PDF documents usually automatically display text horizontally. However, you first need to turn this feature on since, by default, it is off in most job options settings in Acrobat.
To solve this problem, follow these steps:
a) Open your PowerPoint presentation.
b) From the Main Menu bar, click on File, then on Print.
c) From the Print dialog box, choose the Adobe PDF or the Distiller printer driver and click on Properties. This will depend on the Acrobat version you have.
d) From the Properties dialog box, click on the Adobe PDF Settings tab.
e) Choose the setting (Job Options) you wish to edit and click on the "Edit Conversion Settings" button.
f) On General tab of the dialog box that pops up, check the "Auto Rotate Pages" option and choose either "Collectively, by file" or "Individually".
g) Click OK and, if requested, give a file name to this new Job Options setting.
h) Click OK again and in the Print dialog click OK to proceed to make a PDF.


Ivan Cook
chief Editor