Adobe Acrobat Tutorial: 8 Tips on How to Use Adobe Acrobat Editor

• Filed to: PDF Editor
Adobe Reader is a free tool allows us to view, print or comment on PDF files. However, if you need to do more on PDF documents like editing texts, converting PDF from and to other formats, combing multiple PDF into one, splitting large PDF, and more, you have to update to Adobe Acrobat Editor, which is Adobe Acrobat XI. This Adobe Acrobat PDF Editor comes with many useful PDF editing tools that can be easily accessed. You can add or correct texts in PDF, and even change the font of the texts without any fuss. Here is the complete Adobe Acrobat Tutorial that helps you to fully make use of this Adobe Acrobat Editor.


- Part 1: How to Edit a PDF in Adobe Acrobat Editor
- Part 2: How to Combine PDF Files in Adobe Acrobat Editor
- Part 3: How to Create a PDF in Adobe Acrobat Editor
- Part 4: How to Convert PDF to Word, Excel with Adobe Acrobat Editor
- Part 5: How to Split PDF with Adobe Acrobat Editor
- Part 6: How to Deactivate Adobe Acrobat
- Part 7: How to Turn Off the Adobe Acrobat Speed Launcher
- Part 8: Adobe Acrobat Troubleshooting
PDFelement Pro for Windows - The Best Adobe Acrobat Editor Alternative
PDFelement Pro is a best alternative to Adobe Acrobat Editor and comes with advanced OCR feature. With the professional PDF editor you can edit the texts, images, and other elements in PDF documents. You can also convert PDF to other files formats, such as Word, PPT, Excel etc.
Why Choose This Adobe Acrobat Editor Alternative:
- Edit PDF texts, images and links even the scannen PDF files.
- Convert PDF to images, Word, Excel, PPT, EPUB and more formats.
- Create PDF from other formats and create PDF forms easily.
- Mark up and annotate PDF files with multiple markup tools.
- Combine multiple files into PDF and split PDF into several files.
- Convert multiple PDFs in batch and scanned PDFs.
Part 1: How to Edit a PDF in Adobe Acrobat Editor
Step 1
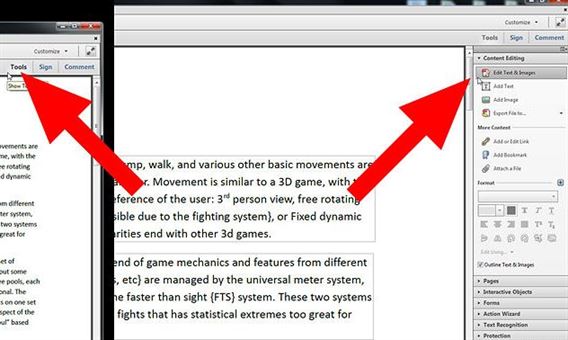
In order to edit a PDF you will need to be using the Adobe Acrobat Pro. Once you have opened it on your computer the first stage is to expand the side toolbar on the page.
Step 2
Once you have opened the toolbar, you will need to select the Tools option. Then select Content Editing followed by the Edit Text & Images option.
Once you have completed these steps you should find that any text that can be edited will be outlined in a think black line. You can then begin to edit the text as you wish. This can be done using the cursor (as you would with other word processing software) and by typing text in.
Step 3
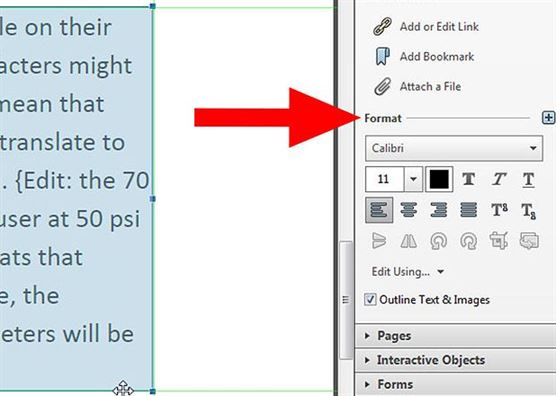
You can also adjust the size of the text blocks by clicking on the blue handle and dragging to resize. The green lines offer a warning to you where your newly added text will appear out of line with the rest of the content of the PDF.
ou can even edit the font and size of your text by using the options that are highlighted in the relevant tools section.
Part 2: How to Combine PDF Files in Adobe Acrobat Editor
Another great thing that Adobe can do for you is bring together a variety of different PDFs and collect them as one document. This allows you to have one PDF that contains images, text, spreadsheets and forms to make for ease of navigation and use.
Step 1
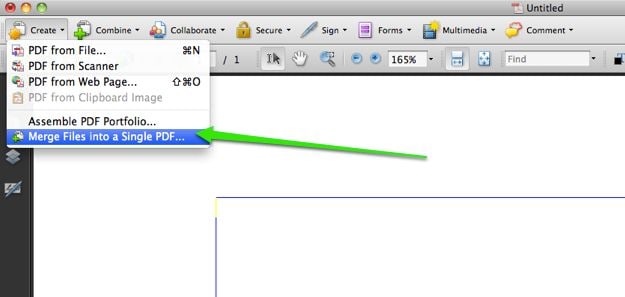
Open up Adobe and click on the create PDF button that is within the main toolbar.
Step 2
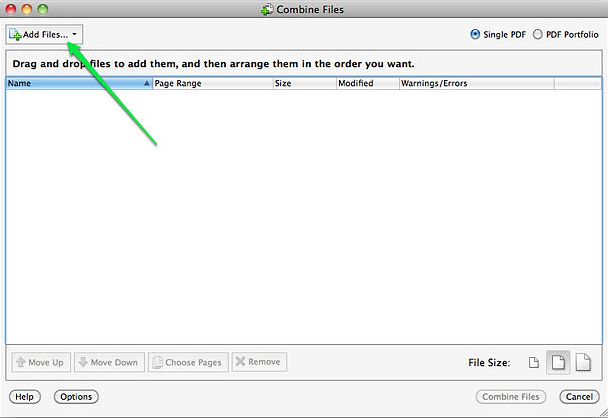
The option that you will need to select for this process is Merge Files into a Single PDF. This will allow you to combine all the files that you require into one PDF.
By clicking on Add Files you will be taken to another screen that will allow you to browse all of the different files on your computer and easily select those that you wish to place in the PDF.
Step 3
A list of files will be created in the main box and you can move them around as you wish to create a different order.
Once you are happy with the order that you have in this preview box, press Combine files and the PDF will be combined and ready to save to your desktop.
Part 3: How to Create a PDF in Adobe Acrobat Editor
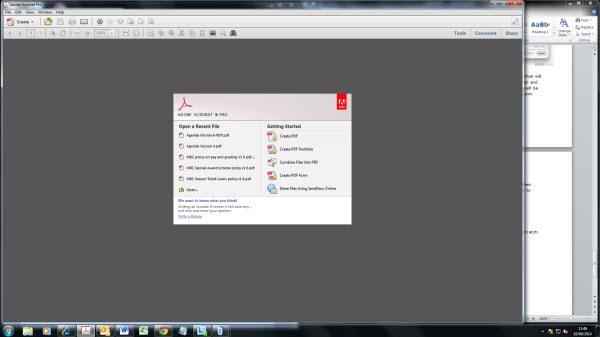
When it comes to creating a PDF you can use Adobe to create one from scratch by using the Create PDF option in the main screen.
You can choose to create a PDF from an existing file. This file may be an Excel Spreadsheet, a Word document or even a page on the internet but they all have one simple method that can be used to turn them into PDFs.
Step 1
Open the document in its normal way. Select the File menu and then choose the Print option (it is important that you do not use the toolbar shortcut for this).
Step 2
Once in the printer screen choose Adobe PDF in the printer dropdown box.
If you click OK then you will be asked where this file will need to be saved once completed. You can select your desktop or local file that you wish to save to. You may find that several screens open up during this process; this is normal.
Step 3
The PDF print process should not take long to complete and any issues will be highlighted to you during the creation process.
After that, you will get a PDF file ready to be used, emailed or combined to make a larger PDF.
Part 4: How to Convert PDF to Word, Excel with Adobe Acrobat Editor
Not only can you convert your Microsoft Word document into a PDF but using Adobe Acrobat you can also convert back the other way; turning your PDF into a Word document ready for editing.
You may have tried to do this by cutting and pasting information from PDF to Word or Excel but have found formatting issues. If this is the case then you will be pleased to know that the process is much simpler than you think.
Step 1
By clicking on the File option on Adobe you will be given the Open choice. You can then pick the PDF file that you wish to convert.
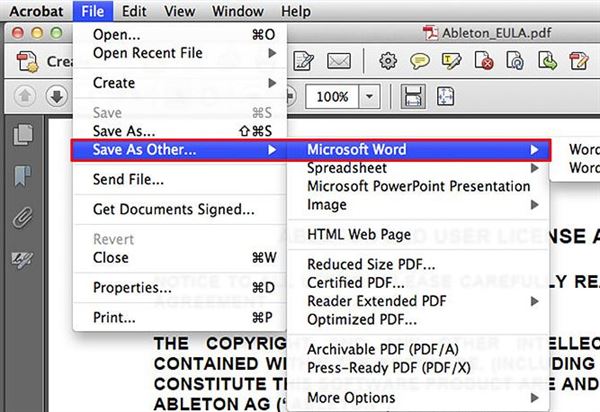
Step 2
Then click the File menu to save the file as Microsoft Word. Adobe will then open a pop up screen which will prompt you to save the document.
Step 3
You then should be able to open your newly created Word document and make the amendments that you require. There will be no loss of formatting and the document should appear as it did in the PDF.
Part 5: How to Split PDF with Adobe Acrobat Editor
Once you have your PDF created for either one or many different documents you may find that you need to split it down into two or three PDFs. This will usually be due to email size restrictions as the PDF can sometimes be quite large. There is a simple way to split the document back down using Adobe.
Step 1
Using the Tools option and then select Pages. Then you will see the option called split the document. Click it.
Step 2
A pop-up box will open which will ask you to specify the restrictions that you wish to place on the document such as; number of pages or file size. It can also create a new document for every top level bookmark if you have applied these.
Step 3
You then simply click OK and the PDF will be splitted down into separate files ready to be sent or stored as you require.
Part 6: How to Deactivate Adobe Acrobat
Why You Need to Deactivate Adobe Acrobat?
If you get a license for an Adobe product like Adobe Acrobat Editor, you can use this Adobe product on two computers but only in different time. If you want to use this Adobe Acrobat Editor on a third computer, you need to first deactivate it on the computer that you will no longer use it. And if you want to remove the Adobe Acrobat from one computer and install it on to another computer, you need to deactivate Adobe Acrobat. Please remember that uninstalling will not be able to deactivate the Adobe product automatically.
Steps to Deactivate Adobe Acrobat:
Step 1: Make sure the computer with the Adobe Acrobat that you want to deactivate has connected to the Internet.
Step 2: Launch the Adobe Acrobat and go to the "Help" menu to choose the "Deactivate" option.
Step 3: And then select the "Deactivate Permanently" option. Done!
Part 7: How to Turn Off the Adobe Acrobat Speed Launcher
What is Adobe Acrobat Speed Launcher?
When you install Adobe Acrobat on your computer, you will get Speed Launcher automatically installed. Adobe Acrobat Speed Launcher can help you to shorten the time you need to start the Adobe Acrobat. Actually, it will run automatically once you start your computer. However, Speed Launcher will consume your system memory. So you might wonder how to turn off Adobe Acrobat Speed Launcher. Here is the solution for you.
Simple Steps to Disable Speed Launcher:
Step 1: Open the "C" drive on your computer. And open the "Users" folder and double click to open your username folder.
Step 2: Go to "Appdata" > "Roaming" > "Microsoft". And then open the "Windows" folder to go to "Start".
Step 3: Now open Program and go to the "Startup" folder.
Step 4: Find the "Speed Launcher" icon and remove it from the "Startup" folder. Then Speed Launcher will no longer run automatically when you start your computer.
Part 8: Adobe Acrobat Troubleshooting
Common Issues on Using Adobe Acrobat Editor
1. Can't edit PDF in the expected font in Adobe Acrobat?
To edit texts in the font you want, you must first purchase the font and install it on your system, or you can only change color, word space, or font size.
2. Unable to create PDF from Microsoft Office 2007 in Adobe Acrobat?
Before creating PDF in Adobe Acrobat, you need to first check whether the version of Adobe Acrobat you are running is compatible with the version of Microsoft Office document you want to convert.
3. Why I cannot combine LiveCycle Designer PDF in Adobe Acrobat?
LiveCycle Designer is a separate software from Acrobat. You can view the PDF created by LiveCycle Designer in Adobe Acrobat reader. However, due to the different structure, you cannot combine LiveCycle Designer PDFs in Adobe Acrobat as other PDFs that created by Adobe Acrobat.


Ivan Cook
chief Editor