How to Add Image to PDF on Mac (macOS 10.15 included)
• Filed to: Mac Tutorials
At times, you may need to add images into a PDF file. You can try using Mac Preview, but it comes with limitations. Luckily, this article covers four solutions on how to add image to PDF on Mac, including adding an image into a PDF using PDFelement Pro. Let's get started! Follow the steps in this article; you can find 4 solutions on adding images to PDF on Mac with PDFelement, Adobe Acrobat, Preview, and Hipdf.
- Solution 1. Add Image to PDF on Mac with PDFelement
- Solution 2. How to Add Image to PDF on Mac Using Adobe Acrobat
- Solution 3. How to Add Images into PDF Mac Using Preview
- Solution 4. Add Image to PDF on Mac with Hipdf
Solution 1. Add Images to PDF on Mac with PDFelement
PDFelement is a professional and easy-to-use PDF editor, it supports to editing PDF images, PDF text, PDF links, text font and more. This feature-rich PDF editing tool is reliable, and powerful enough that can meet all your PDF editing requirements with ease. And PDFelement also has a Windows version. Follow the below steps to add an image to a PDF file on Mac.
How to Add Image to PDF on Mac with PDFelement Easily
Step 1: Click 'TRY IT FREE' to download PDFelement. Then you need to drag PDFelement to "Application" and launch it.
Step 2: Click 'Open' and select your PDF document. Or you can directly drag and drop it into PDFelement.
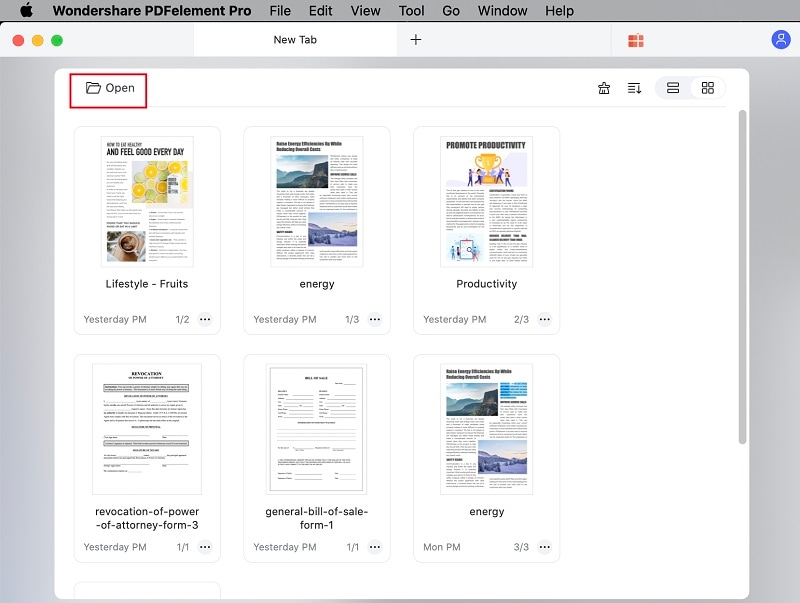
Step 3: To add image to PDF on Mac, you need to click the 'Image' tab first, then choose the 'Add Image' button. Then click anywhere on your PDF file and select the image from your local folder to add it to the PDF file.

Step 4: After adding images to your PDF file, you can edit and modify the images as needed. Click on the image to open the image editing control panel. From here, you can rotate, replace, extract, and crop images.

Why Choose PDFelement to Add Image to PDF
PDFelement is an advanced PDF editor for Mac and Windows. Often, we get frustrated at the workplace because we cannot edit, convert, combine, or search a PDF file. Its advanced tools will help you solve these challenges. PDFelement will enable you to edit your document quickly and accurately; this saves time and increases work productivity.
Highlight features:
- OCR will allow you to turn scanned PDFs into fully editable, selectable, and searchable documents.
- It allows you to add an image signature to your file, and you can customize your signature the way you want.
- You can convert PDF documents to Word, Excel, PowerPoint, image files, and so on.
- PDFelement provides high security to your documents. The software has a built-in feature that allows the encryption of files.
Solution 2. How to Add Image to PDF on Mac Using Adobe Acrobat
Adobe Acrobat is a PDF editor, viewer, and creator. It is considered a leading industry-standard software that can efficiently add images to PDF. It also allows for editing and managing PDF documents, extracting PDF data, and more. If you are wondering how to add an image to a PDF, luckily, it is relatively easy with Adobe Acrobat. Just follow the steps below to get started inserting an image into a PDF.
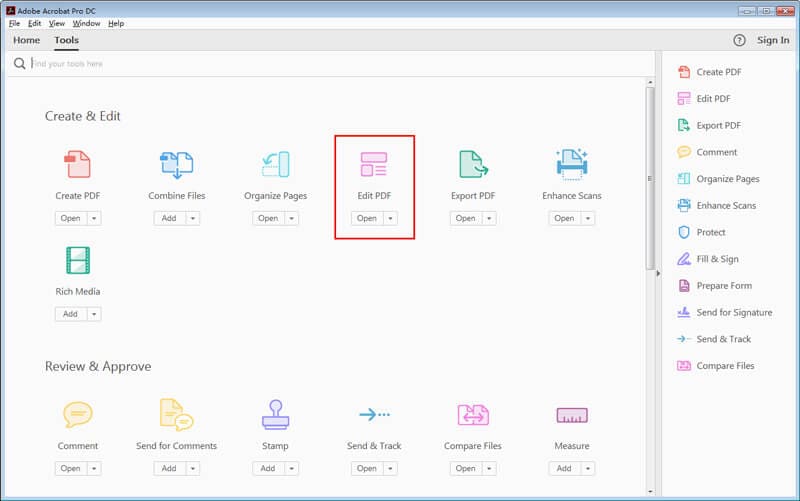
Step 1: Click 'Tool' > 'Edit PDF' on the start-up page.
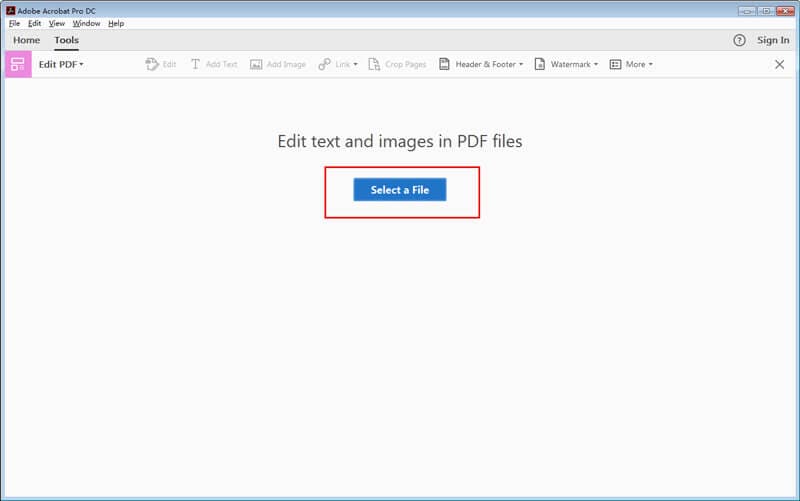
Step 2: Click the 'Select a File' bottom, navigate your PDF file, and open it.
Step 3: Click 'Add Image' and choose the image file you need to place.

Step 4: Click where you want to add image into PDF Mac.

Solution 3. How to Insert Images into PDF Mac Using Preview
Preview is the default software on Mac systems for viewing images and PDF documents. The software also has some functions for editing PDFs or images. It can encrypt, crop, fit, and re-size PDFs. It also lets you control the brightness and contrast of ideas or add pictures to a PDF on Mac.
Step 1: Open Preview, go to 'File' > 'Open' to open your PDF file first.
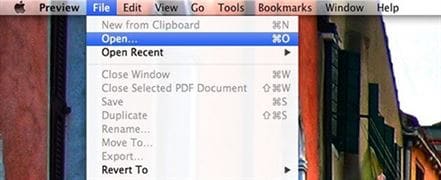
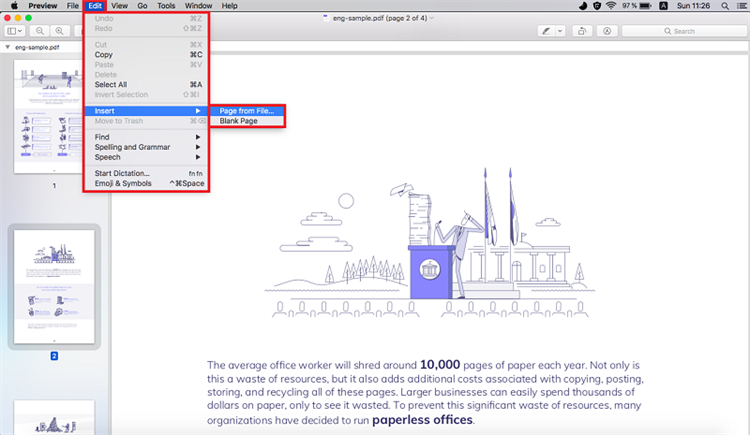
Step 2: Click 'Edit' > 'Insert' > 'Page from File,' then choose the image you want to add to the PDF file. Now you've to insert the image to the PDF on Preview Mac.
Solution 4. Add Image to PDF on Mac Online
You can also use online programs to add an image to a PDF document. Hipdf is an online tool that will help you do this with ease. This method is relatively easy and is suitable for those not wishing to download software or if users only need to add images to their PDF on a one-time basis. Use the online tool PDF Filler to add a photo to your PDF easily for free.
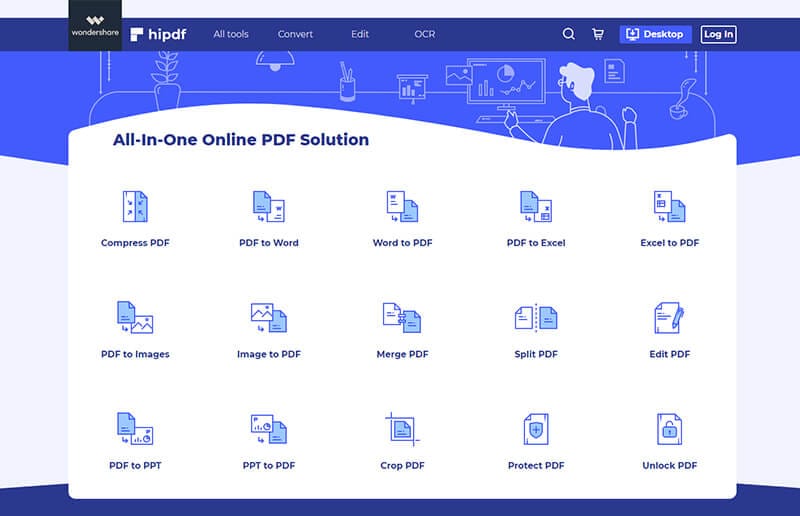
Step 1: Visit 'Hipdf.com' and click the 'Edit' menu.
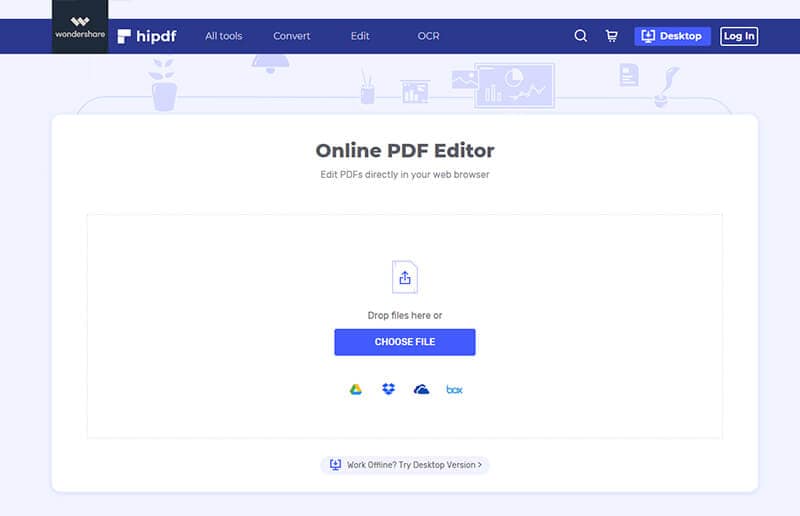
Step 2: Click 'Choose File' and upload your PDF.
Step 3: After your file has been imported. Click 'Add Image.' You can adjust the size as you need.

Conclusion
After reading this article, you can easily add image to PDF on Mac now. This article introduces four 4 useful tools for you to reach your aim. One of the best solutions is using PDFelement to add images to PDF files. This software can help you add images to PDF on Mac and help you do the same steps on Windows. Its awesome features on editing PDF are waiting for you to explore.


Ivan Cook
chief Editor