This article guides you on how to effectively reduce PDF size on Mac without losing quality by using the best PDF compressor - PDFelement.
Dealing with large or heavy files is sometimes daunting, especially when you want to share or spare some memory space in your device? Mac is not an exception, and it is no surprise scores of Mac users look for plausible ways to reduce PDF size on Mac. While there are several options available, you ought to find the right platform to avoid getting under-par services. Fortunately, this article takes you through a step-by-step guide on how to reduce PDF size on Mac without losing quality.
How to Reduce PDF Size on Mac
PDFelement for Mac is a powerful PDF software suitable for various PDF tasks, including reducing PDF size. This amazing program is fast, compatible with several devices, supports a variety of file formats, easy to use, affordable, and has an elegant interface. The combination of excellent features makes it a complete PDF package, and you won't need a third-party tool. This all-in-one platform allows users to create, convert, edit, annotate, print, OCR, share, compress, and merge PDF files with ease. You can download the free trial version or upgrade to the affordable premium version for better experience.
How to Reduce PDF Size on Mac with PDFelement
PDFelement offers an intuitive interface and straightforward way to reduce PDF size on Mac as shown by the steps below.
Step 1 Open a PDF File
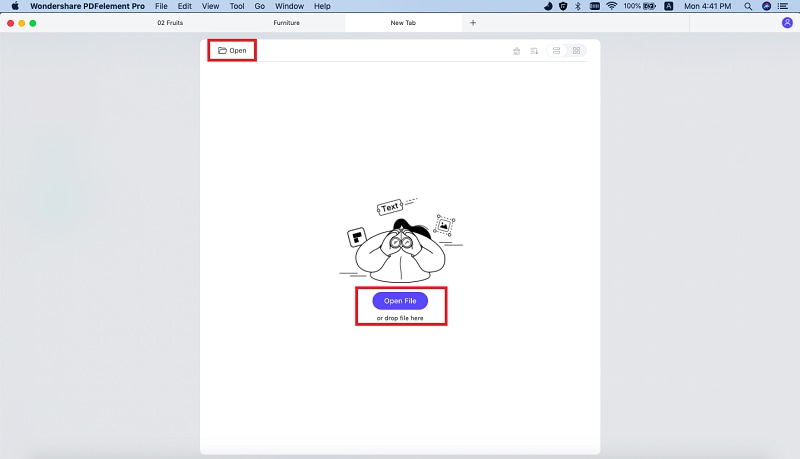
Launch PDFelement on your Mac to access the primary interface. Once opened, click the "Open File" button and browse to upload the target file from the file directory.
Step 2 Reduce PDF Size
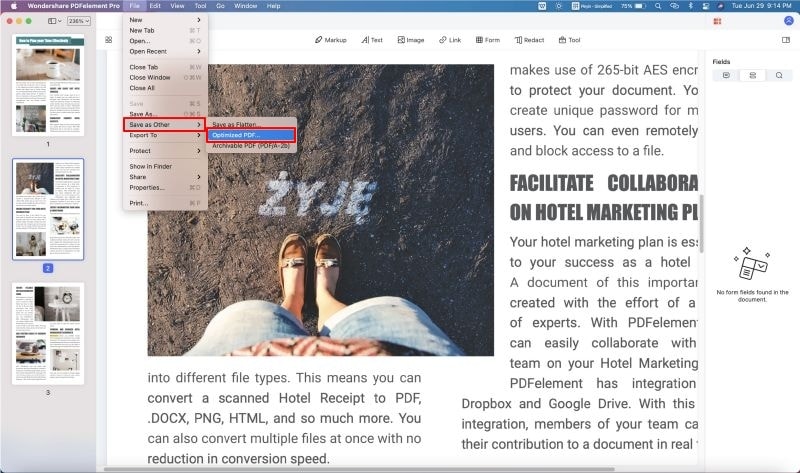
When the PDF file is loaded on PDFelement, go to "File" > "Save as Other" > "Optimized PDF."
Step 3 Change Compression Option
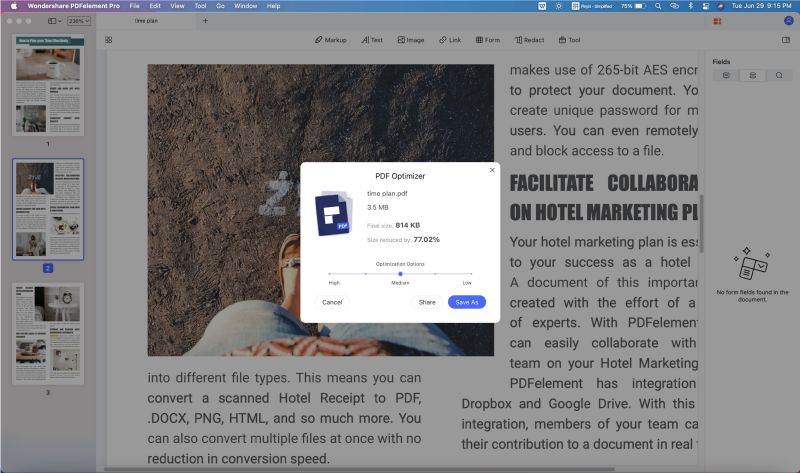
Now, the "PDF Optimizer" wizard will appear on the screen. Here, select the desired file compression level. The options available are High, Low, and Medium. Select one option and click the "Save As" button to compress and save your PDF file. You can also choose to compress and share by clicking the "Share" button.
How to Reduce PDF Size on Mac with Preview
Preview is a Mac built-in app that allows users to view images and PDF files. While this is the primary function of Preview, it also allows users to reduce PDF size on Mac. However, the file reduction functionality is not top-notch like those of dedicated PDF tools. Nevertheless, it is worth trying if you need basic PDF compression. The following steps highlight how to reduce PDF size on Mac with the Preview app.
Step 1. Open the target PDF file with the Preview app on your Mac computer. Simply right-click the PDF file, choose "Open With," and select "Preview."
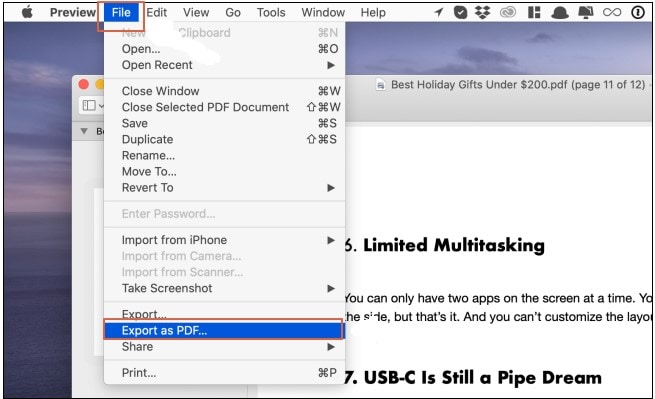
Step 2. With the PDF file open on Preview, navigate to the "File" section and choose "Export as PDF."
Step 3. A pop-up window should appear on the screen. Scroll down to the "Quartz Filter" section and click the respective drop-down icon. From the options displayed, choose the "Reduce File Size."
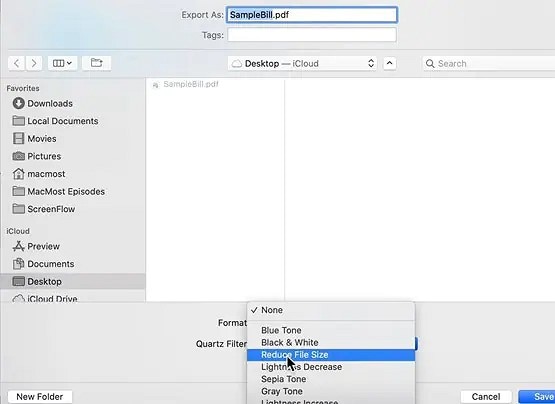
Step 4. When you are satisfied with your selections, click the "Save" button, and your PDF will be compressed.
How to Reduce PDF Size on Mac with PDFexpert
PDFexpert is another good tool to reduce PDF size on Mac. This program allows users to create a lighter copy of the original file for ease of sharing or storage. PDFexpert offers three PDF compression qualities, namely High, Medium, and Low. You simply drag the slider to choose desired compression level/quality. The beauty of this program is that users can share their compressed PDF directly on the interface by clicking the "Share" button. The following steps illustrate how to reduce PDF size on Mac with PDFexpert.
Step 1. Visit PDFexpert's official download page and download PDFexpert for free.
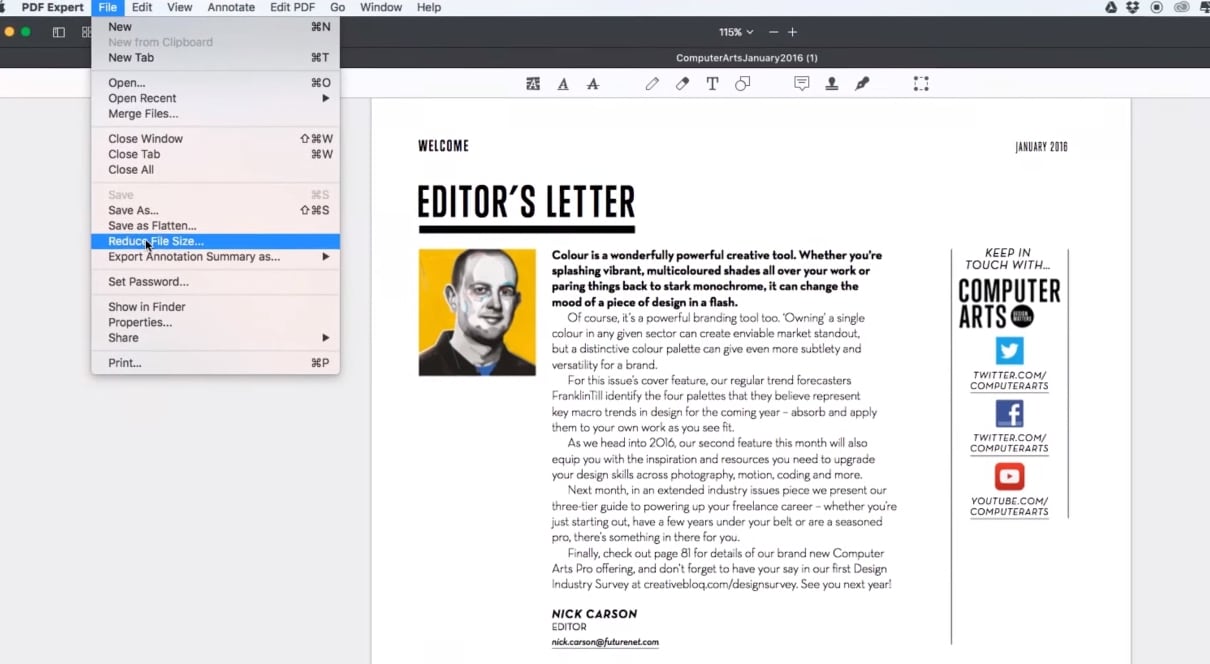
Step 2. Install PDFexpert and open your file with PDFexpert. Once opened, go to the "File" section on the upper menu bar and choose the "Reduce File Size" option.
Step 3. The "Reduce Size" wizard will appear on the screen. Drag the slider to choose the desired compression quality/level. You should see the original size and that of the output on the screen.
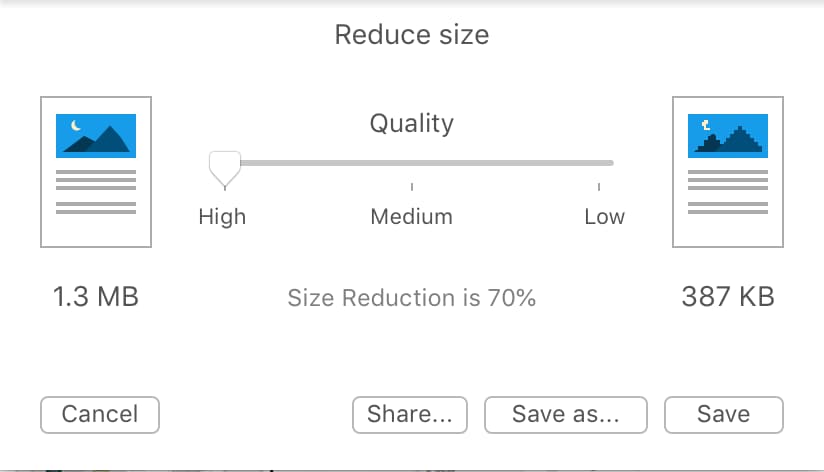
Step 4. When you are satisfied with your selections, click the "Save" button to reduce the size of your PDF file. If a pop-up prompting you to confirm whether you want to go on with compression pops up, just click "Continue" to get the process done.
How to Reduce PDF Size on Mac with Sejda
Sejda is a good tool to reduce PDF size on Mac. This program provides more options to customize your output file to meet your needs. Its compression algorithm optimizes images and removes unwanted fonts and images to make the PDF size smaller. Users can upload files from their local Mac device, Google Drive, and Dropbox. In a bid to make files stay private, Sejda automatically deletes uploaded and processed files after 2 hours. The free version supports up to 200 paged-PDF documents or 100MB. It also allows users to handle a maximum of 3 tasks in one hour. The following steps show how to reduce PDF size on Mac with Sejda.
Step 1. Visit Sejda reduce PDF size online page and click the "Upload PDF files" button.
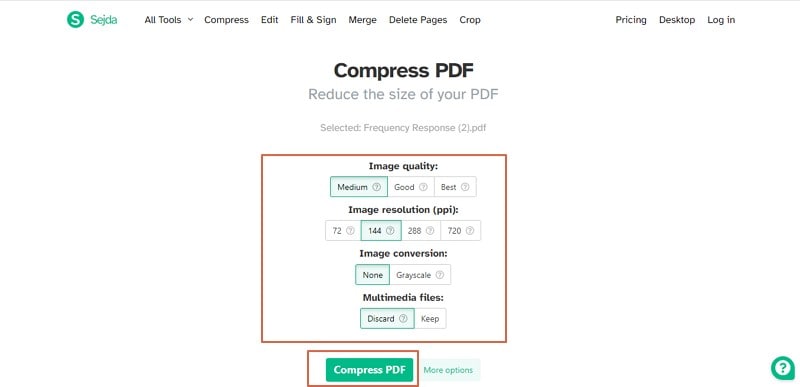
Step 2. When the file is uploaded, click the "More options" tab, then choose the desired image quality and resolution. When you are done, click the "Compress PDF" button.
Step 3. Finally, click the "Download" button to fetch your compressed PDF file.


