In this article, you get a complete guide on scanning images to PDF and making them editable effectively.
People create and interact with photos frequently. However, handling a collection of photos on your device in their format is not a good experience. It is tiresome scrolling down the photos, and someone can easily tamper with your photo. This is why scores of people scan photos to PDF. PDF format offers a more convenient way to interact and share your photos. To scan images to PDF, you need a good tool. Fortunately, this article gives you a step-by-step guide on how to scan photos to PDF with ease.
How to Scan Photo to PDF with PDFelement
PDFelement is a powerful all-in-one PDF solution tool in the market. This amazing program is equipped with top-notch features to help transform the way users interact with their PDF files. Its incredible speed, compatibility, ease of use, and affordability make it suitable for all types and sizes of PDF tasks. Some of the features of PDFelement include printing, converting, creating, protecting, compressing, sharing, performing OCR, and editing PDF files.
Step-by-step Guide on Converting Scanned Image to PDF
PDFelement offers a straightforward interface of scanning JPG to PDF is not a complicated process. The steps are outlined below.
Step 1 Open Scanned Photo
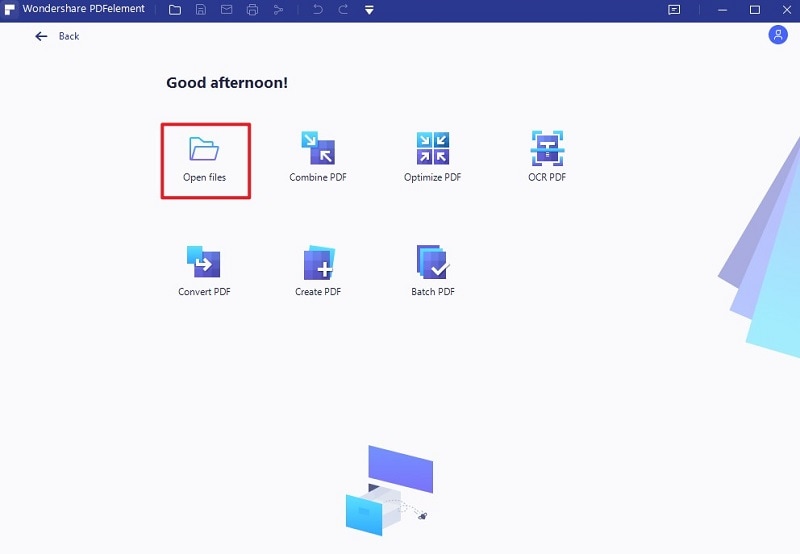
Launch PDFelement on your computer, then hit the “Open files” button on the main window. Choose the photo you want to convert to PDF from the subsequent file explorer window. Click “Open” to upload it.

Step 2 Or Scan Photo to PDF
With the photo now uploaded, head to the “File” section and hover your cursor over the “Create” option. On the options displayed on the right, select “From Scanner.”

Step 3 Select Desire Scanner
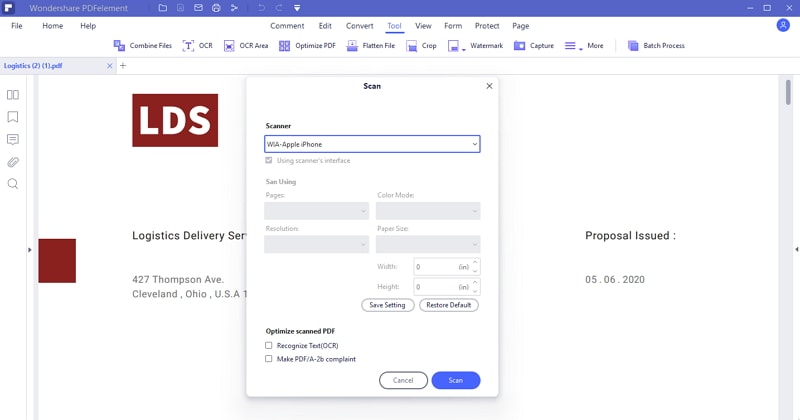
The “Scan” dialog box will pop up on the program’s interface. Here, click the “Scanner” drop-down arrow and select desired scanner. When you are satisfied with your choices, click the “Scan” button. Wait for a few seconds. You will see a notice that the scanning process is complete.

Step 4 Save PDF
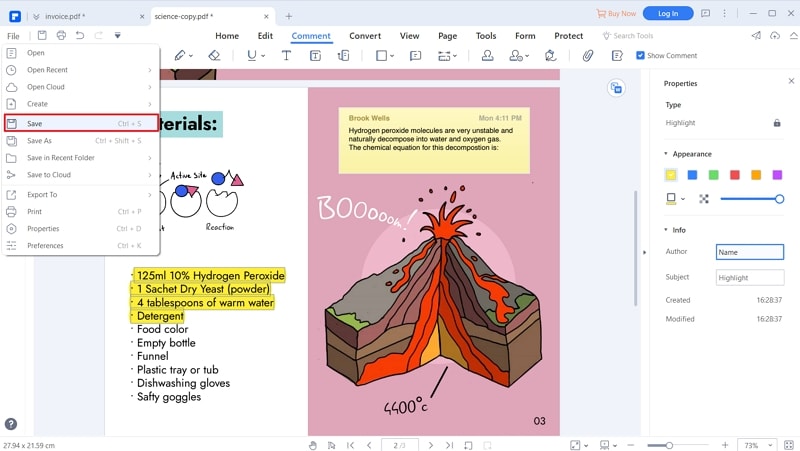
When the program completes scanning JPG to PDF, you need to save your new file to avoid being discarded. Simply go to the “File” menu, then choose the “Save” button.

How to Edit Scanned Image in PDFelement
Editing scanned PDF is hard without a specialized OCR tool. Fortunately, PDFelement offers an easier way to edit scanned images using its OCR feature, as explained below.
Step 1 OCR Scanned Image
To begin with, open the scanned image with PDFelement. When it is loaded, the program will detect a scanned image and propose that you perform OCR. Click the “Perform OCR” button. In the “OCR PDF” pop-up, choose the “Scan to editable text” and select the desired page range. Click “Apply” to apply OCR.

Step 2 Edit Scanned Image
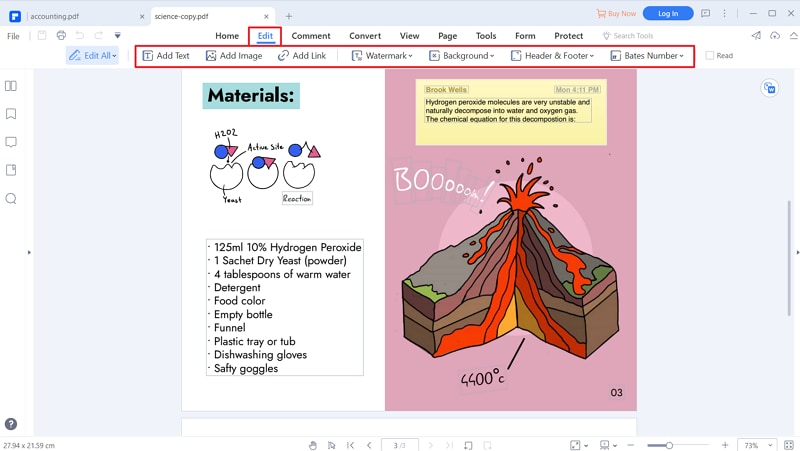
When the OCR process is complete, head to the “Edit” tab and select the edit mode on the far right. You can choose line or paragraph mode. Now start editing your scanned image on PDFelement. When you are done with editing, you can save the changes. Simply head to the “File” section, then choose the “Save” option.


