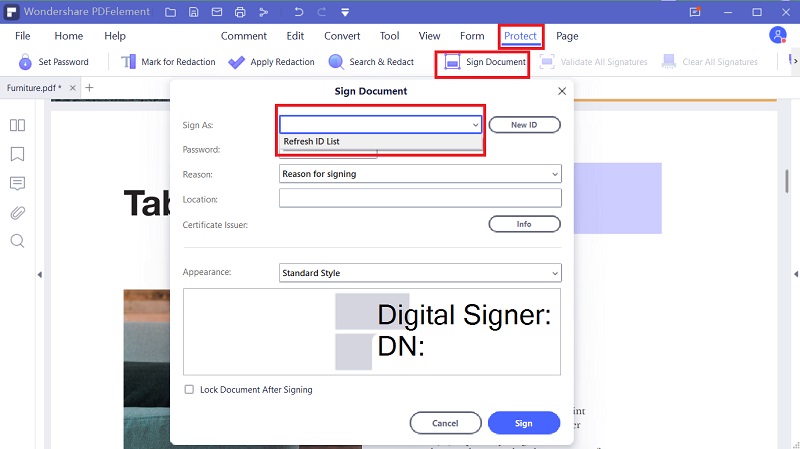
This article guides you on how to create a digital signature using PDFelement.
Digital signatures are easing the way we exchange and verify documents globally. Unlike electronic or traditional handwritten signatures, digital signatures have better security, global acceptance, long-term retention and are generally regarded as high standard. Therefore, knowing how to create a digital signature is becoming crucial. Fortunately, there are several ways to create digital signatures online. However, you need to choose the right platform or risk getting under-par services.
How to Create Digital Signature Online
HiPDF is a popular and effective PDF tool to create digital signatures online. This tool is easy to use, and hence newbies will navigate with ease. This tool creates electronic signatures by typing, drawing, or uploading a signature. Again, you don't have to worry about privacy and security because it uses SSL encryption to ensure you are 100% safe. HiPDF works across several operating systems and browsers. Users can upload files from a local computer, Dropbox, and one drive.
How to create Digital Signature online using Adobe Document Cloud
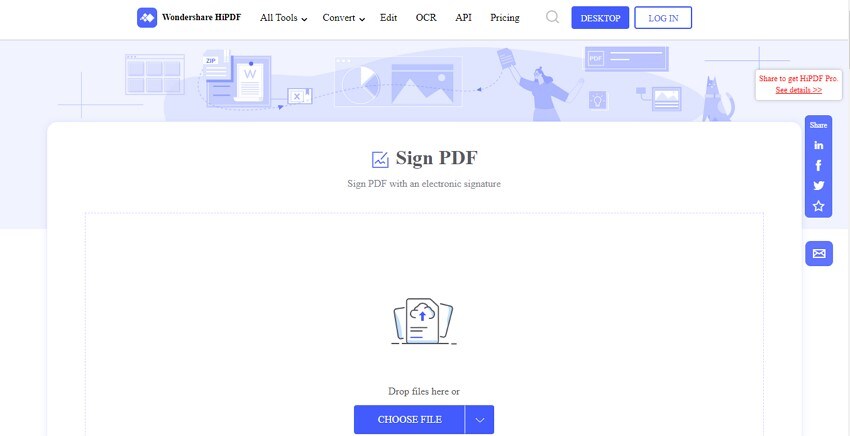
Step 1. Open your browser and navigate to HiPDF to create a digital signature online page.
Step 2. Hit "SELECT FILE" and browse to upload the PDF file you want to add digital signature online.
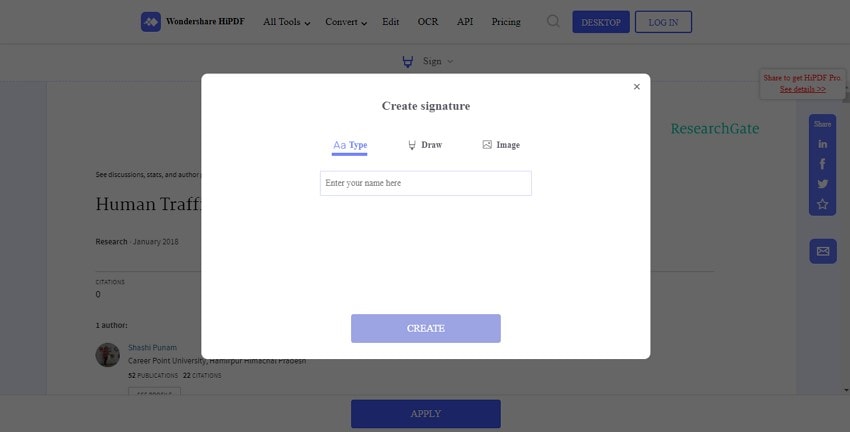
Step 3. Create a digital signature by either typing, drawing, or uploading.
Step 4. Once you are through, hit "Create," then drag the created signature into the desired position on your PDF. Now hit "Apply" to apply your signature on the PDF.
Step 5. When you are done with your selections, hit the "Download" button to fetch your new file.
How to Create Digital Signature Online in Another Way
Adobe Document Cloud is a secure online platform that allows users to sign PDFs easily. This platform lets users sign and fills PDF documents from any browser, including popular ones like Google Chrome and Mozilla. Here, you can upload a PDF through the drag and drop method or browse the file directly from your computer. The major downside of this tool is that it has a lengthy process and can be complicated for newbies. After adding your digital signature, you should download the file or get a link to share your file online.
How to fill and sign PDF online free using Adobe Document Cloud
Step 1. Using your browser, navigate to Adobe Document Cloud. Click the "Select a file" button and browse for the PDF file you want to free create a digital signature.
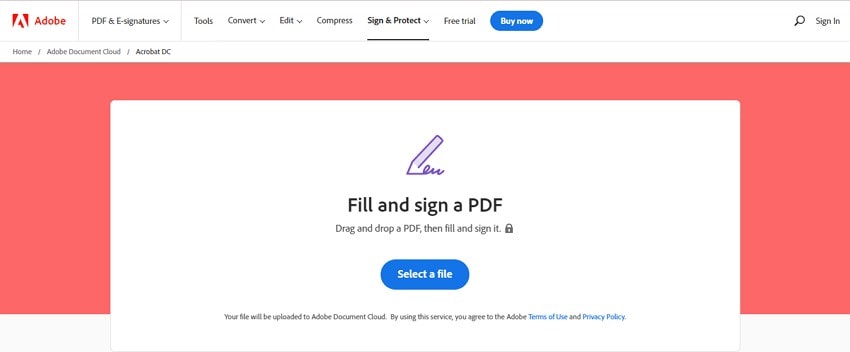
Step 2. When the PDF is uploaded, you will be prompted to sign in to Adobe. Just sign in and complete the fillable forms.
Step 3. Add your digital signature by either typing, drawing, or uploading a signature.
Step 4. When you are satisfied, click "Apply" to trigger the process.
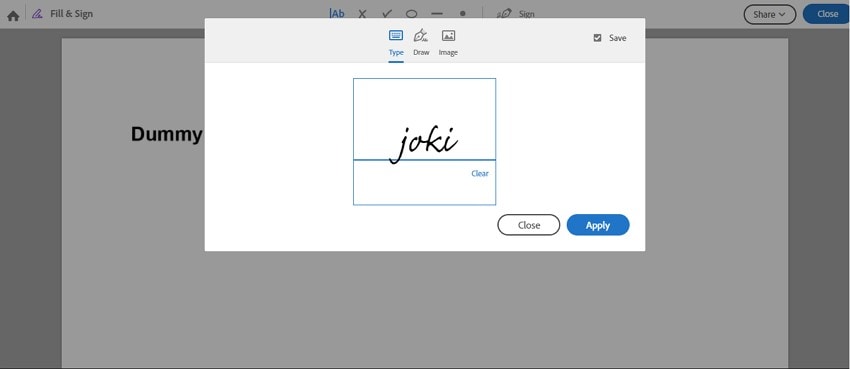
Step 5. Finally, click "Close" to download the file.
How to Create Digital Signature on Desktop
PDFelement is a powerful all-in-one PDF software in the market. This tool is fast, affordable, easy to use, compatible with many devices, and enriched with excellent features. No wonder millions of users and plenty of companies and organizations have made it their indispensable tool. There are several functionalities offered by PDFelement, including edit, convert, create, annotate, view, organize, compress, share, perform OCR, protect, create forms, and print PDF.
Step 1Open a PDF File
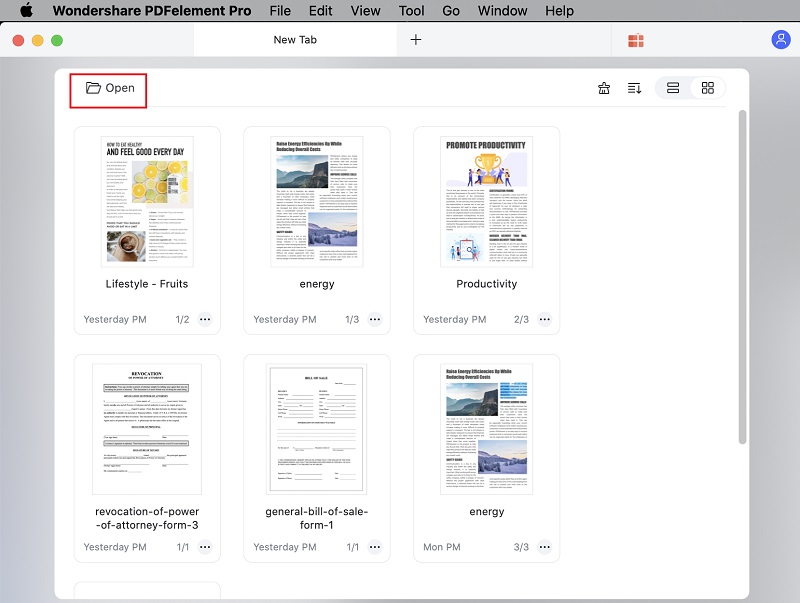
Download, install and run PDFelement on your PC. Locate and click the "Open" icon on the main window to access the file directory. Browse the PDF file you want to create a digital signature. Select the file and hit "Open" to upload to the PDFelement interface. Alternatively, you can drag the file and drop it on the PDFelement interface.
Step 2Insert Digital Signature
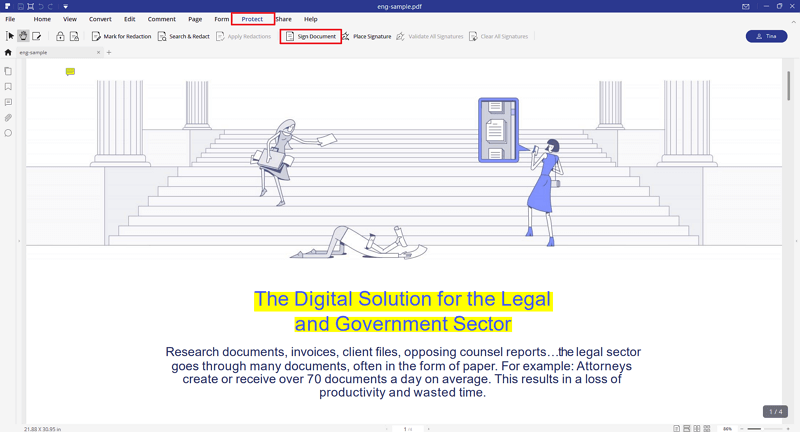
With the PDF file now uploaded, proceed to the toolbar and select the "Protect" tab. From the options below, click the "Sign Document" icon. Drag your cursor to the target location on your PDF and draw a rectangular area. This is where your signature will appear.
Step 3Create Digital Signature
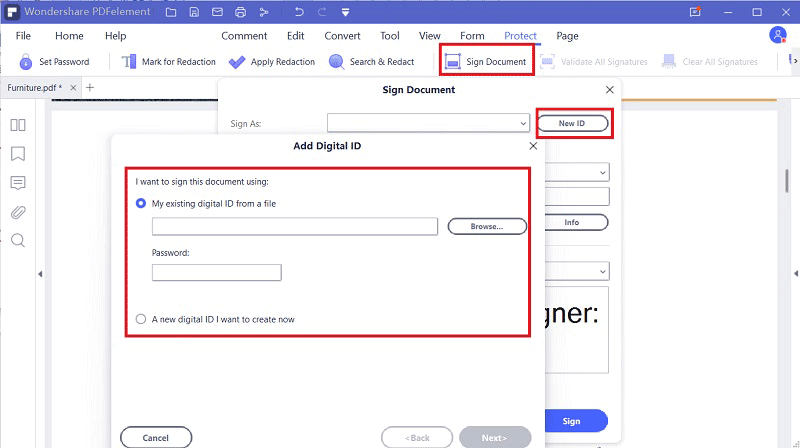
When you finish drawing the signature area and release the cursor, the "Sign Document "window will pop up. This will enable you to create a digital signature. Here, you can create a digital signature using an existing ID or generate a new ID. Hit the "New ID "button and make selections on the subsequent dialog window to create a new ID. Confirm your selections and exit the window.
Step 4Insert a Digital Signature to PDF Document
Click the "Sign Document" window, click the "Sign As" drop-down icon, and refresh your ID list on the "Sign As" window. Select your ID, then fill in the other details as per your preference. Click "Sign" to apply the digital signature to your PDF file when you are done. To save the changes, remember to hit the "Save" icon on top of the window.
