If you are looking for the easiest way to create a digital signature on Mac, this article is here for you.
Digital signatures offer several benefits compared to traditional pen and paper signatures. This is why several Mac users are actively looking for a reliable way to create digital signatures on Mac. Creating a digital signature on Mac is not a complicated task. However, you need an appropriate tool because a tool can make or break your experience. Well, there are several tools in the market and you can easily get confused. Fortunately, this article gives you a comprehensive guide on how to digitally sign a PDF on Mac.
How to Digitally Sign a PDF on Mac
PDFelement Pro is the best all-in-one PDF tool in the market. This program is equipped with an assortment of excellent features that transform the way you interact with PDFs. It never stops here either. PDFelement Pro is affordable, easy to use, compatible with almost all devices, and elegant. With PDFelement Pro, users can convert, edit, create, annotate, sign, protect, perform OCR, organize, share, and compress PDFs with ease.
How to Create a Digital Signature with PDFelement Pro
Follow the step below to create digital signature with PDFelement Pro
Step 1Open a PDF File
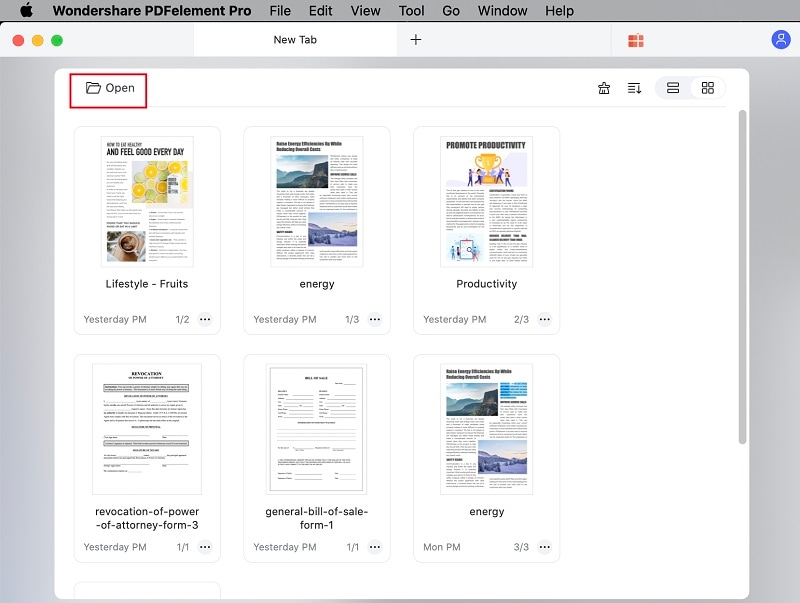
Download and install PDFelement Pro on your Mac. Proceed to launch PDFelement Pro to access the main interface. On the top right, click the “Open” icon and you will be taken to the file directory window. Here, browse for the PDF file that you want to create digital signature on Mac. Select the respective file upload button to import the PDF file to the interface. Alternatively, you can just drag the file and drop on the interface.

Step 2Create Digital Signature on Mac
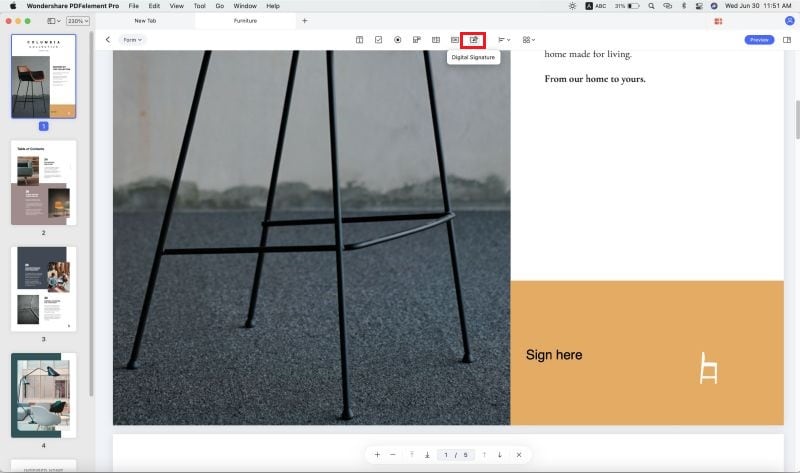
When the PDF file is successfully uploaded, proceed to the “Form” section. From the options displayed, click the “Digital Signature” icon. Upon clicking the digital signature button, drag your cursor to draw a region over the PDF where you want your signature to appear.

Step 3Add Digital Signature to PDF
When you release the cursor, you should see the “Sign Here” and “Signature1” writings in the drawn region. Double-click on it, and the “Digital Signature Properties” dialog box will be displayed. Here, you can change the appearance of your signature to meet your needs. Move along the General, Appearance, Action, and Signed tabs to customize your signature. When you are done with your selection, click “Close” to close this window and apply your selections to the signature. Finally, save your file by going to “File”>” Save As.”


