Want to send JPG files, but the size is too large? Learn how to compress jpg to pdf format and reduce the size of the file. Not only will it combine all the jpg files into a single one, but it will compress the file size without compromising the quality.
How to Compress JPG to PDF with PDFelement
There are many ways to compress jpeg files to pdf, but PDFelement is possibly the best all-in-one software to have with a ton of features and that too without the need of any internet connection. Its main features are listed below:
● Edit: You can create and edit files in existing pdf forms, or you can create them from scratch using any other file format and edit them with a wide range of customized text sizes, fonts, graphics, and much more.
● Annotate: You can highlight any important stuff in the documents or add notes or annotate on the pdf files using almost any available color using the annotate feature.
● Print: You can also print the documents in-app and customize them according to preference, e.g., page size, orientation, number of pages printed from the document, etc.
● OCR: Using the OCR (Optical Character Recognition) feature, you can extract text from PDF files without converting them to any other format.
● Create and Convert PDF: You can create PDF or convert existing Word or PowerPoint files and any document type to PDF format with just a single click. You can also create PDFs from jpg images which automatically compresses the jpg files to PDF and reduces its overall file size.
Step-by-Step Guide on How to JPG to PDF
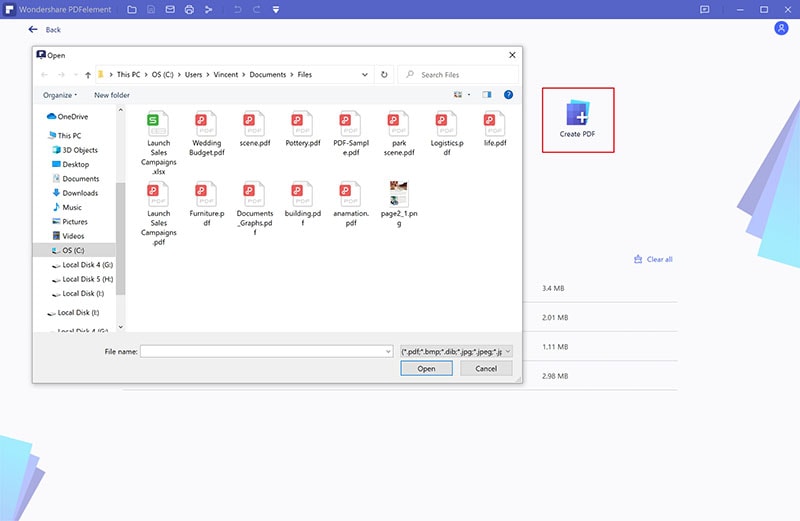
Step 1 Choose JPG File from Local Storage
Open WonderShare PDFelement and click on create PDF to choose the jpg file you want to compress to PDF.
Step 2 Convert JPG to PDF
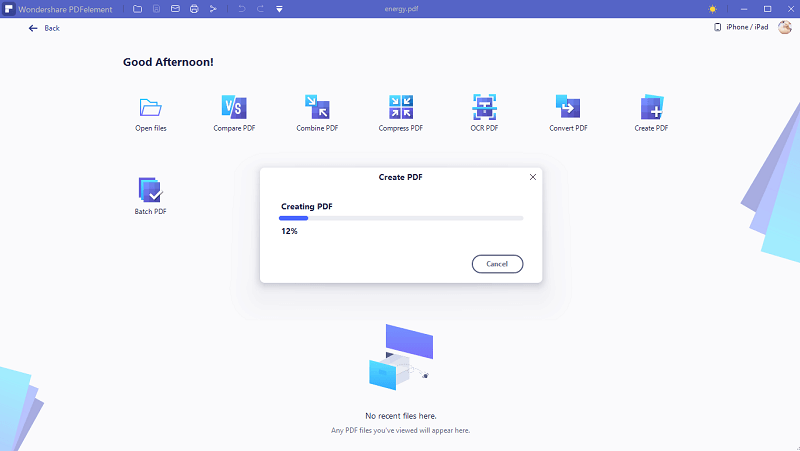
As soon as you select the JPG file, it will automatically convert to PDF.
Step 3 Compress JPG to PDF
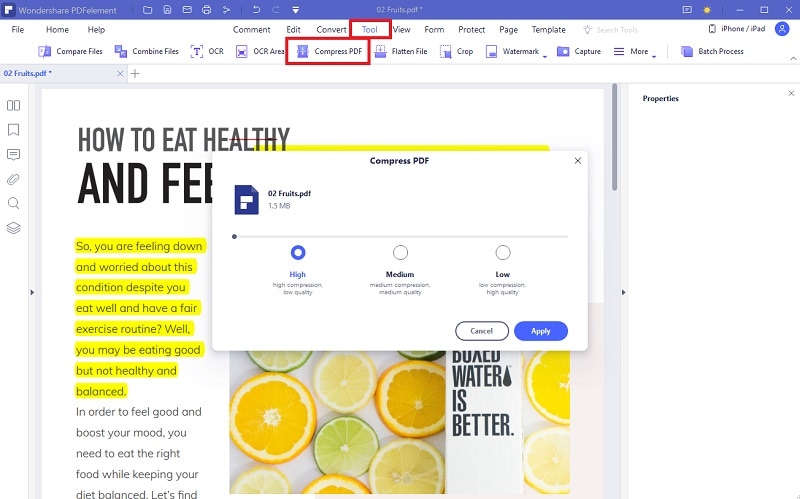
After the JPG is converted to PDF, click on the Compress PDF button on the top ribbon bar and choose the compression rate from High, Medium, and Low settings.
Step 4 Save Compressed PDF file
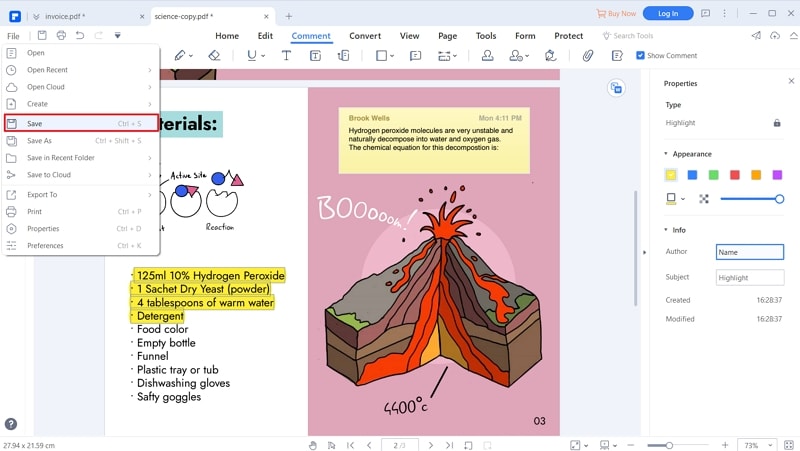
After the JPG file is converted and compressed to PDF, click on ‘File’ and then ‘Save’ to save the PDF file to your desired location.
How to Batch Compress JPG to PDF
Most of the time, you have multiple JPG files you want to combine and compress into a PDF form, so it is easier to transfer, share, and available in a single file. Follow the step nu step guide below to learn how to batch compress jpg to pdf using WonderShare PDFelement.
Step 1 Choose Multiple JPG Files to Create
Click on Create PDF and select multiple files you want to batch compress by pressing ‘ctrl’ and clicking on all the files you wish to batch compress.

Step 2 Convert JPG to PDF
All the files will automatically be converted to PDF once you select them from your local storage.

Step 3 Save Converted PDF
Save the converted PDF by clicking on 'File' and then 'Save.'

Step 4 Choose to Batch Process
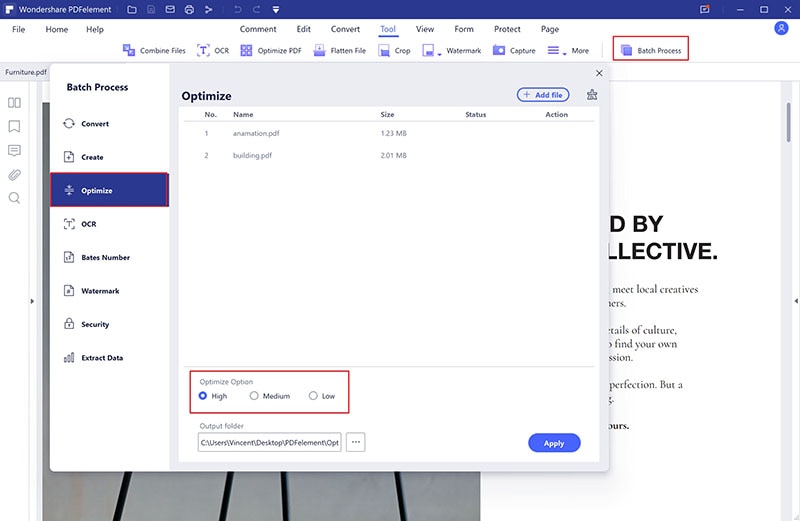
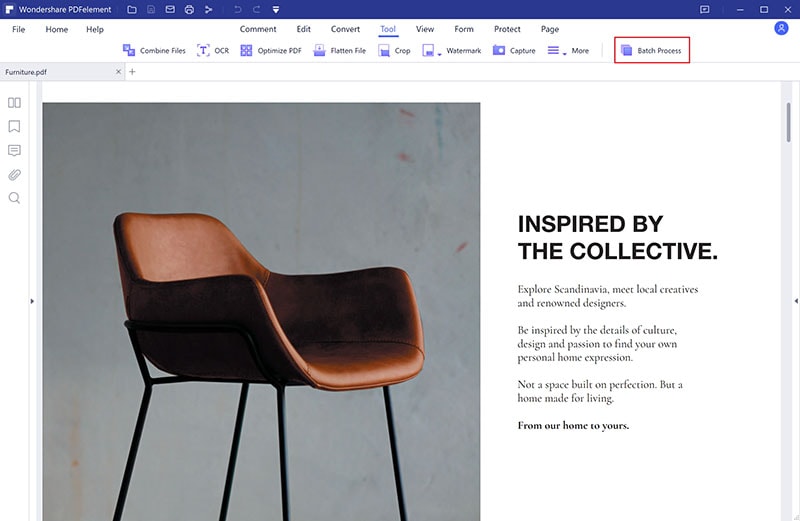
Click on the 'Tool' button from the top ribbon bar and select Batch Process.
Step 5 Choose Multiple Files
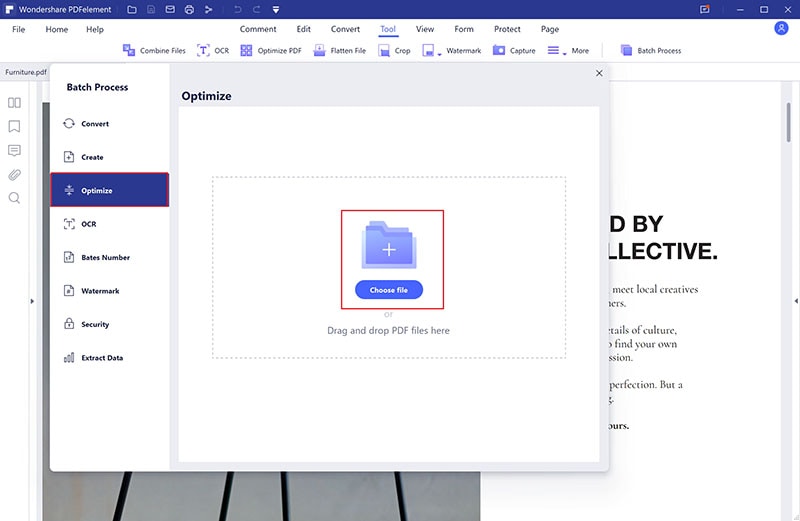
When you click 'Batch Process,' a dialogue box will open where you can either drag and drop or 'ctrl' and click on all the converted PDFs you wish to Batch process and compress.
Step 6 Batch Process JPG to PDF
After you have selected the files, you just have to select the compression optimization from 'High, Medium, and Low' and then click 'Apply' to apply the selected settings to the whole batch you wish to compress, and then you can save the files on your local storage.
