This article gives you a useful guide on how to scan photo to PDF using the best PDF tool - PDFelement.
The evolution of cameras across devices makes photo files one of the highly used media formats. However, photo apps are limited, and you cannot do a lot with photo files. Perhaps you want to organize them for better view and editing. To obtain this level of flexibility, you need to scan photo to PDF or rather convert image to scanned PDF. However, this is easier said than done. If you don’t know how to scan photo to PDF, you won’t enjoy the benefits of working with PDF files. Fortunately, this article takes you through a complete guide on how to scan photo to PDF with ease and speed.
How to Scan Photo to PDF
PDFelement is one of the finest PDF software in the market. This all-in-one powerful PDF software provides a variety of excellent PDF features. PDFelement allows users to edit, create, convert, protect, organize, compress, share, annotate, and perform OCR on PDF files. This program provides superfast processing speeds and an intuitive interface that eases user navigation. Again, it is compatible with nearly all devices and offers a free trial version.
Step-by-step Guide on How to Scan image to PDF
Scanning an image to PDF with PDFelement is simpler than ever. The following steps show how to scan image to PDF using PDFelement.
Step 1 Create PDF from Scanner
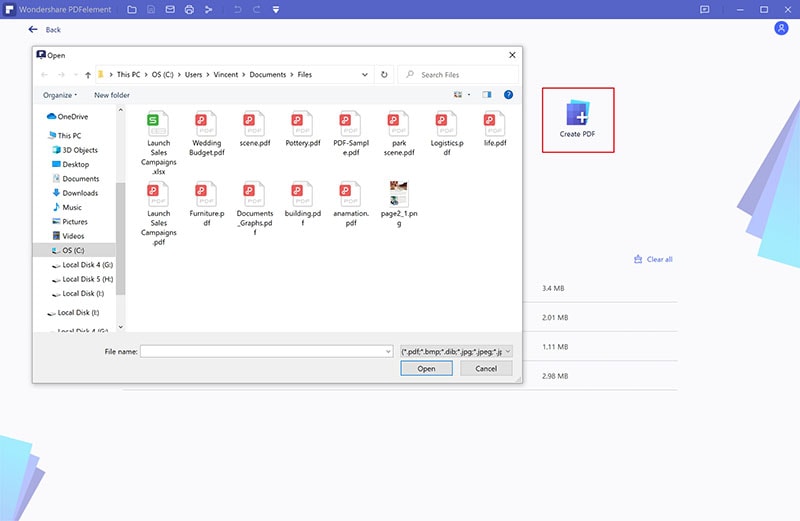
Launch PDFelement on your device, then click the “Create PDF” button on the main interface. Choose the target photo on the displayed file explorer window, then hit “Open” to upload it to the PDFelement window.
Step 2 Choose a Scanner
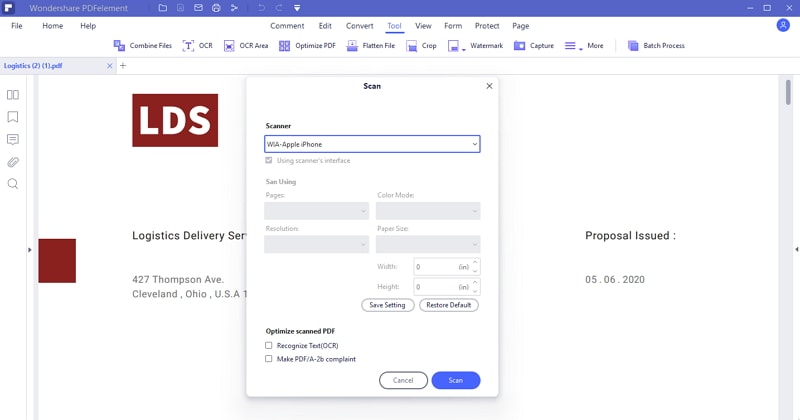
When the photo file is uploaded, proceed to File>Create> From Scanner. The Scan dialog box will be displayed on the PDFelement window. Here, click the “Scanner” drop-down icon and select a suitable scanner. You can also set the resolution, page size, color mode, and page range.
Step 3 Scan image to PDF
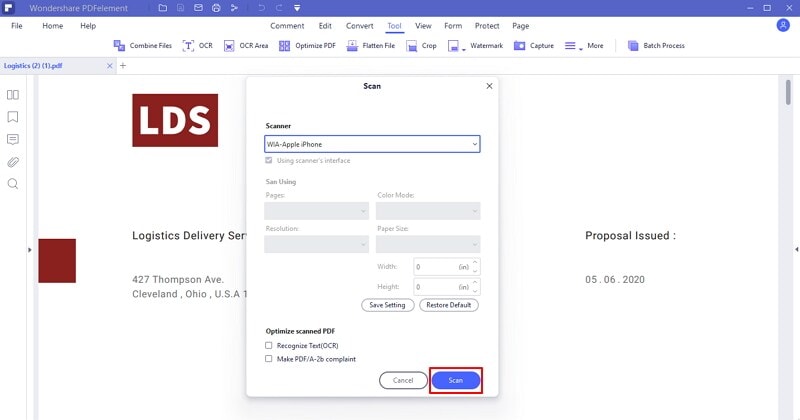
Once you are satisfied with your selections, proceed to click the “Scan” button at the bottom-right of this pop-up window. Choose your preferences from the subsequent screen instructions, then wait for the program to scan your photo to PDF. Your new PDF file is displayed on the program when the process is done. Go to the “File” menu and hit the “Save” button to save your new PDF.
Tip on Converting Scanned Photo to Editable PDF
Scanning a Photo to PDF might not be enough. Perhaps you need to edit or search texts in your new PDF file. Although it appears like an uphill task, the secret is to convert scanned images to editable PDF with PDFelement. The good news is that the process is easy and effective. Once you have PDFelement installed, you are a click away to make your scanned PDF editable.
How to Convert Scanned Image to Editable PDF
The following steps illustrate how you can convert scanned PDF into editable PDF.
Step 1 Perform OCR
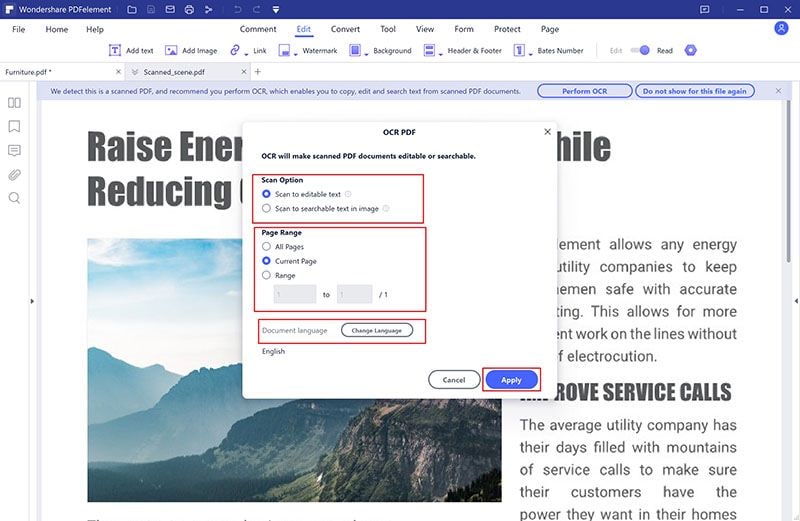
First, open your scanned PDF file with PDFelement. When the file is loaded on PDFelement, the program automatically detects that the file needs to be taken through OCR. Simply click the “Perform OCR” button to proceed.

Step 2 Choose OCR Language and Scan Option
“Change Language” button. Once you are done with the selections, hit the “Apply” button to trigger the OCR process.
Step 3 Edit PDF Text
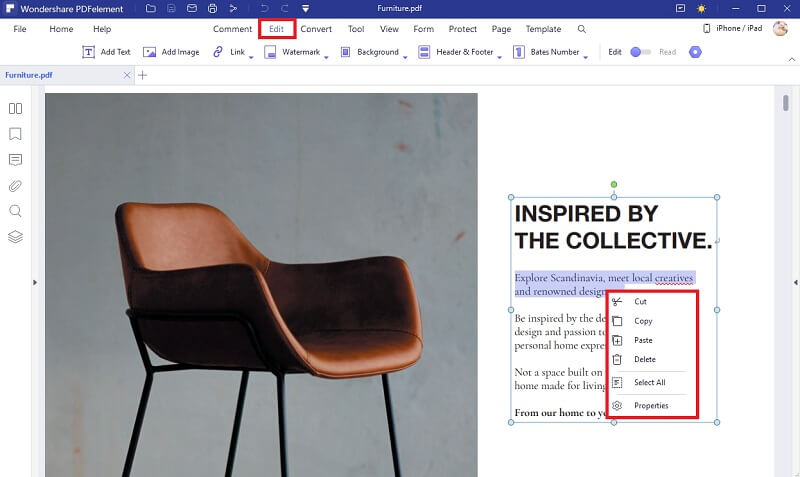
When the OCR conversion is complete, your scanned PDF texts are now editable. Go to the “Edit” tab and the toolbar and start editing your PDF texts depending on your need.
