
We all find ourselves needing to extract text from an image for editing or reformatting. Whether you are dealing with scanned documents or editing text within a picture, converting images to text is essential.
Microsoft Word offers OCR technology, allowing you to do this quickly and efficiently without any additional software. In this article, we will discuss some of the top methods to convert images to text in MS Word for easy access.
In this article
Convert Image to Text Using Microsoft Word
With a straightforward and simple interface offered by MS Word, you will not need any other tool to extract the text from images. The document management tool recognizes the text in your document and performs OCR seamlessly. Once you have extracted the written content from the image, you can edit it for accuracy. To learn how to use this software to edit a scanned image, follow these steps:
Step 1. Insert the Image into Word
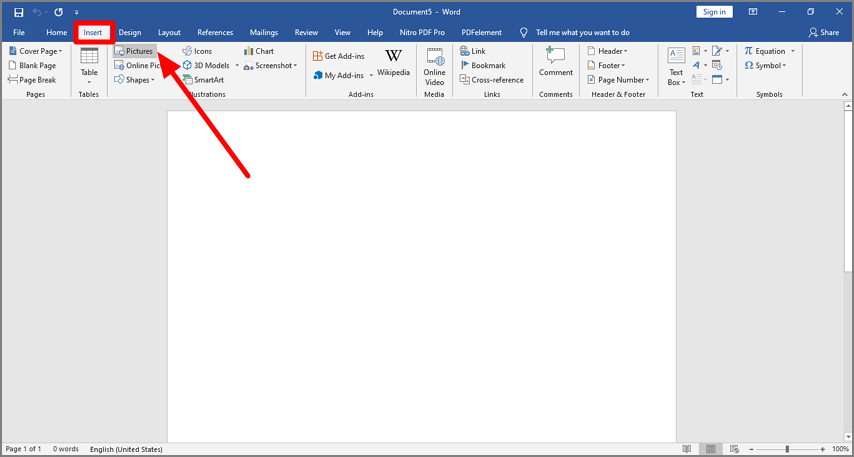
To begin with, launch Microsoft Word on your PC and open a blank document. Open the “Insert” tab to import a “Picture” from your device. Alternatively, you can also drag and drop the desired image into the blank document to proceed.
Step 2. Save the Image as a PDF
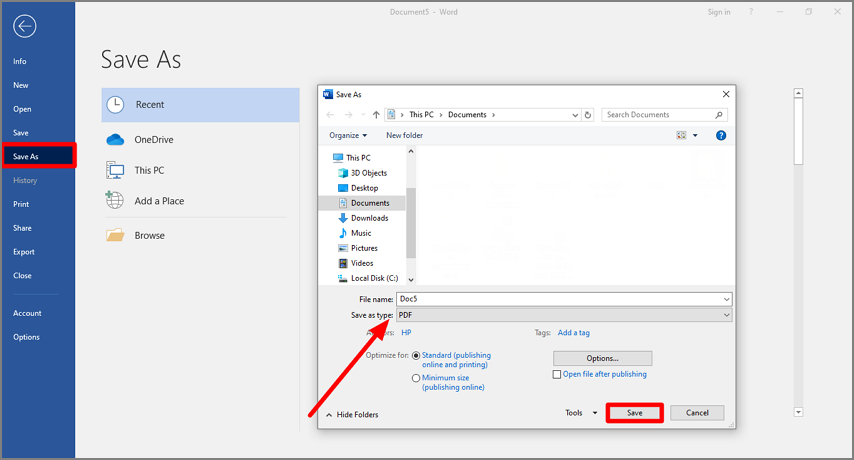
Once the image is inserted, access the “File” tab and click the “Save As” button to save the image as a PDF file.
Step 3. Open the PDF and Review the Text
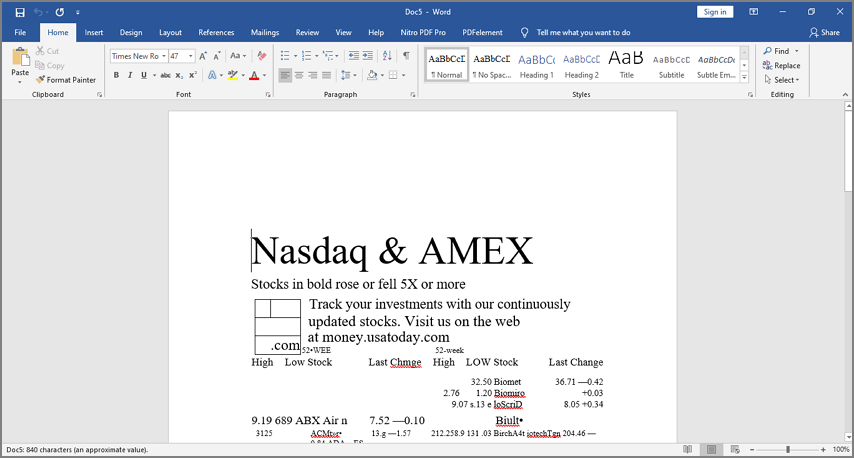
After saving the image, open the “File” tab and click the “Open” button to locate and select the PDF. Once Word automatically converts the text from the image into editable text, review and edit it where needed.
Benefits
Using OCR by MS Word does not require you to install additional software.
The text recognition process is straightforward and ideal for quick small-scale conversions.
Limitations
Despite its benefits, Word may not handle multiple images at once or complex layouts well.
It lacks advanced OCR capabilities, leading to reduced accuracy in certain cases, like tilted images or non-standard fonts.
Convert Image to Text with Advanced Tools
If you need to perform basic conversions, MS Word is the right tool for text extraction. However, for more precise OCR abilities and additional features, you can use advanced tools. A few of the popular methods that allow you to perform OCR on the image are mentioned in the following section:
Method 1. Using PDFelement
Wondershare PDFelement is a robust PDF editor offering powerful OCR functionality and flexibility when converting images to text. It supports every scanned image for detection, from low to high quality. If you want to detect text from specific image quality, you can set the DPI of text recognition. You can choose among 72, 150, and 300 DPI for precise execution. This platform gives you the liberty to select the custom pages you need to recognize text from. If you want to execute OCR on just the currently opened page or the entire PDF, you can do that, too.
Step 1. Open the Scanned Image File in PDFelement
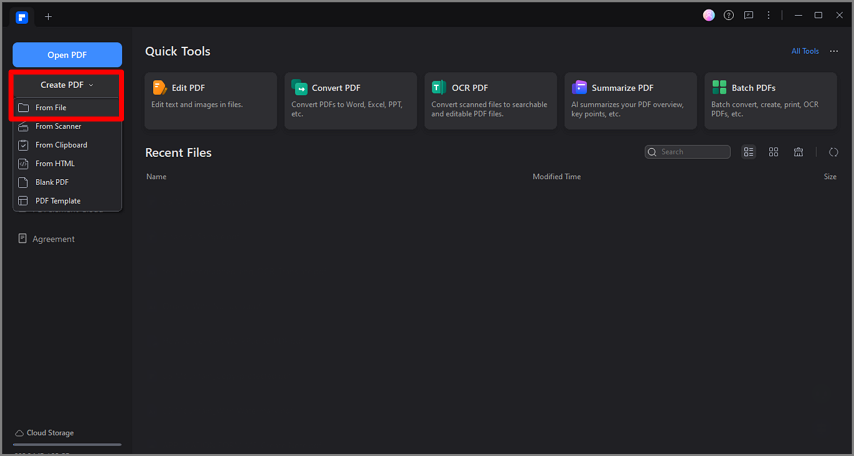
To start the process, launch the main interface of PDFelement and expand the “Create PDF” menu. Now, select the “From File” option and import the scanned image to the main interface.
Step 2. Perform OCR on the Image to Continue
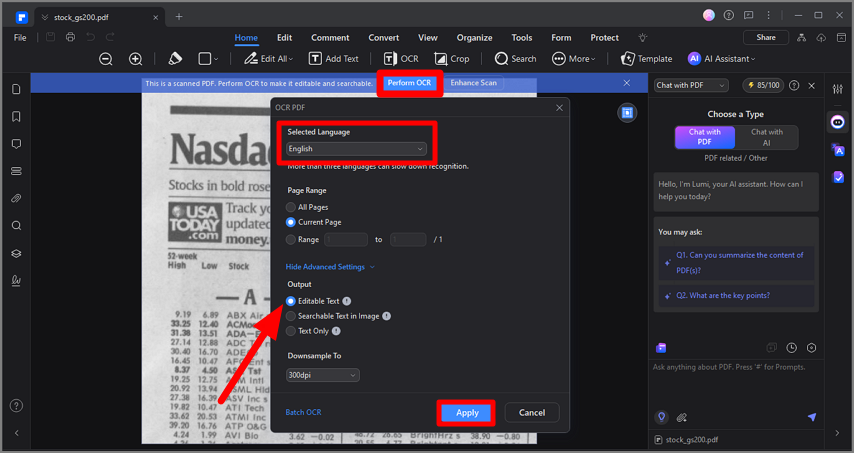
When the system recognizes scanned text in the document, it will display a prompt on the top. Click the “Perform OCR” button to access the OCR PDF window for further settings. After selecting the “Language” of the text, select the “Editable Text” option to “Apply” changes.
Step 3. Convert the Processed File to Word Format
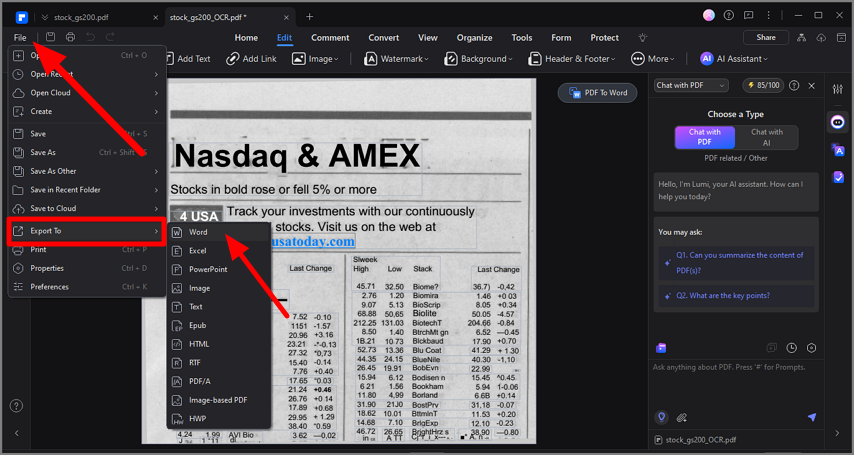
Once the text has been extracted, access the “File” tab from the top left and hover the mouse over the “Export To” option. From the extended menu, select the “Word” option to save the file in Word format in your desired location.
Step 4. Open the File in the MS Word Interface
After the file is saved to your device, launch MS Word and open the converted document to perform any editing if required.
Why Choose PDFelement?
- It delivers a higher level of accuracy compared to Microsoft Word in terms of OCR.
- PDFelement is suitable for batch processing and detecting text from multiple images quickly.
- This tool offers added features like PDF editing, cloud storage, and annotations to provide an all-in-one solution.
Method 2. Using Google Drive
Another method that converts your scanned images into text is using Google Drive. Its subsidiary, Google Docs’ built-in OCR technology seamlessly detects the text in your photo and extracts it from your files. Once the text is extracted, you can perform different text modifications according to your needs and requirements. To learn how to use this platform for effective OCR, follow the guide below:
Step 1. Upload the Image to Google Drive
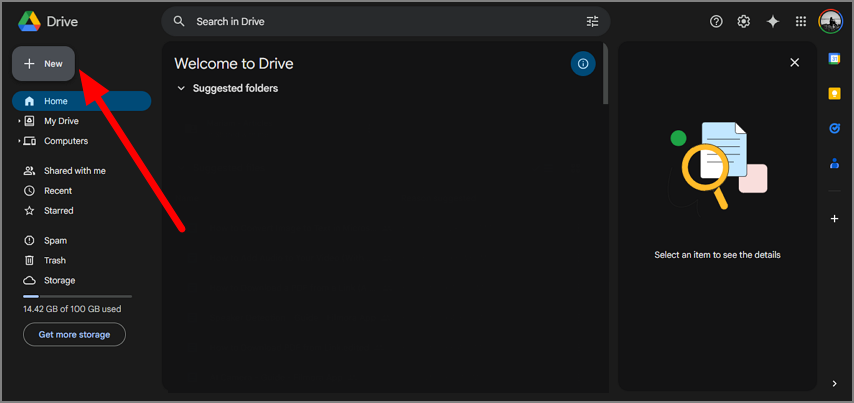
To start, open Google Drive and right-click to select the “+” button, and select the image you want to process.
Step 2. Open with Google Docs
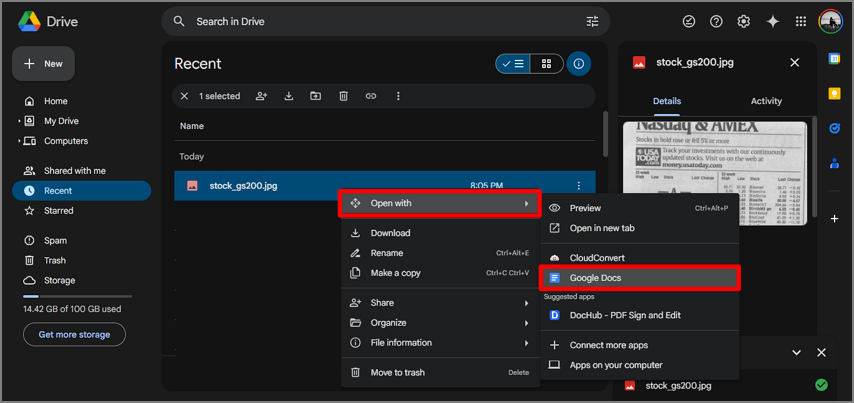
Once uploaded, select the “Open With” drop-down menu to select “Google Docs.” When opened on Google Docs, the system automatically performs OCR on the image and extracts text into an editable format.
Step 3. Download as a Word Document
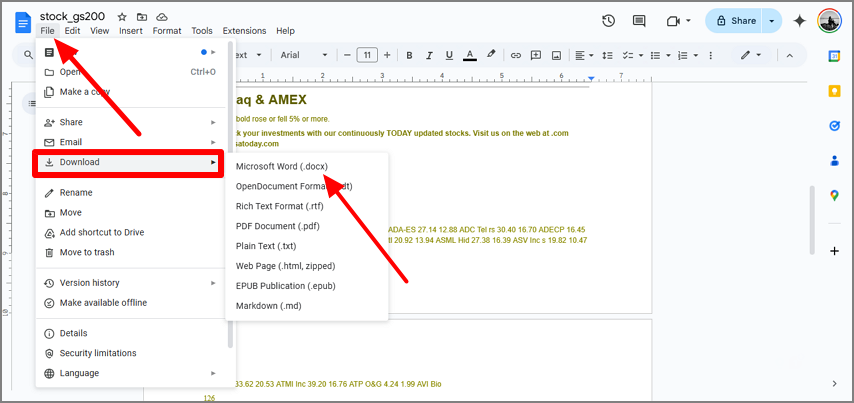
After you have edited the text, access the “File” tab from the top left and expand the “Download” option to save the file as “Microsoft Word” file.
Pros
Unlike most tools that provide OCR utility, Google Drive is completely free for basic OCR needs.
For easy editing and shareability, it syncs your uploaded files across all devices.
Cons
This platform needs a stable internet connection to upload and open files.
The OCR efficiency of this platform can vary depending on image quality.
Method 3. Using Free Online OCR
If you do not want to install any software, you can use online tools to convert images to text in Microsoft Word. Free Online OCR is one such tool that focuses on efficient file format conversions and OCR functionality. It allows you to select the format into which you want to convert the scanned image. Moreover, you can also enter the document’s original language for accurate detection of text. Follow the guide below and learn using this online facility for OCR performance:
Step 1. Upload and Convert
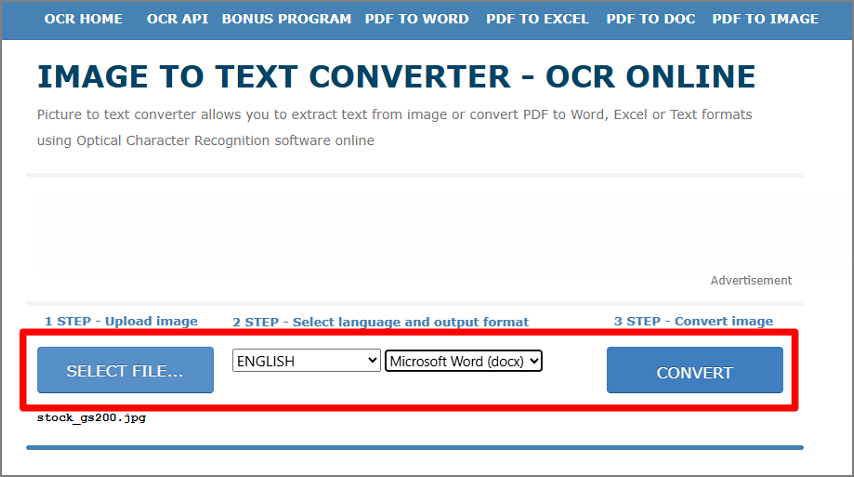
Open Free Online OCR and upload your image using the “Select File” button. Choose the file’s language and enter “Word” as the format from the designated menus. Click the “Convert” button to execute the conversion process.
Step 2. Download the Output File
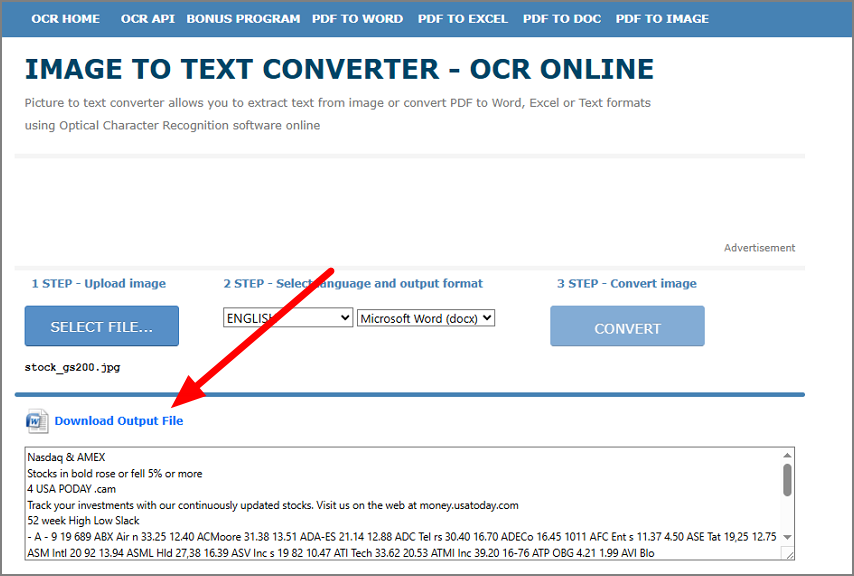
When the detected text appears in the text box, you can edit it from there. If needed, click the “Download Output File” button to save the file as a Word document.
Method 2. Using Google Drive
Another method that converts your scanned images into text is using Google Drive. Its subsidiary, Google Docs’ built-in OCR technology seamlessly detects the text in your photo and extracts it from your files. Once the text is extracted, you can perform different text modifications according to your needs and requirements. To learn how to use this platform for effective OCR, follow the guide below:
Conclusion
To sum up, this article highlighted the methods of converting scanned images into editable text using various methods. Although MS Word offers a built-in OCR feature, it may lack accuracy to a certain extent. Therefore, we explored PDFelement as an alternative OCR tool for accurate text recognition in multiple languages.