Any of you could feel the need to save a screenshot as a PDF, and fortunately for you, PDFelement makes the work so much easier! Just follow the methods mentioned below and chill away!
Are you wondering how to add a screenshot to your presentation without ruining the quality? Or are you looking to store your screenshots in a reliable format? Well, we have just the solution for you! All you have to do is convert your screenshots into a PDF file. In this article, we will introduce one of the best tools for converting screenshots into PDFs with an easy-to-follow step-by-step guide of how to convert screenshots to PDF.
How to Convert Screenshot to PDF
In order to convert a screenshot into a PDF file, you have to take the help of external tools. One of such tools is Wondershare PDFelement. It is an all-in-one PDF editor that you can use across any platform such as mobile, computer, etc.
It gives you the option to create and edit PDFs online and also allows you to collaborate with people. Some of the main features of Wondershare PDFelement are listed below:
● OCR: PDFelement has the OCR feature. OCR stands for Optical Character Recognition that allows you to convert images of typed, handwritten, or printed text into machine-encoded text.
● Editing Features: PDFelement offers different editing options to you for creating and editing existing PDFs. It offers a wide range of text sizes, fonts, graphics, and much more.
● Annotation: PDFelement allows you to add notes, comments, and annotate PDF files. You can highlight different things using this feature.
● PDF Converter: PDFelement also has a PDF converter that allows you to convert your PDF files into other formats.
Step-by-Step Guide on How to Convert Screenshot to PDF
Step 1 Download PDFelement for Free
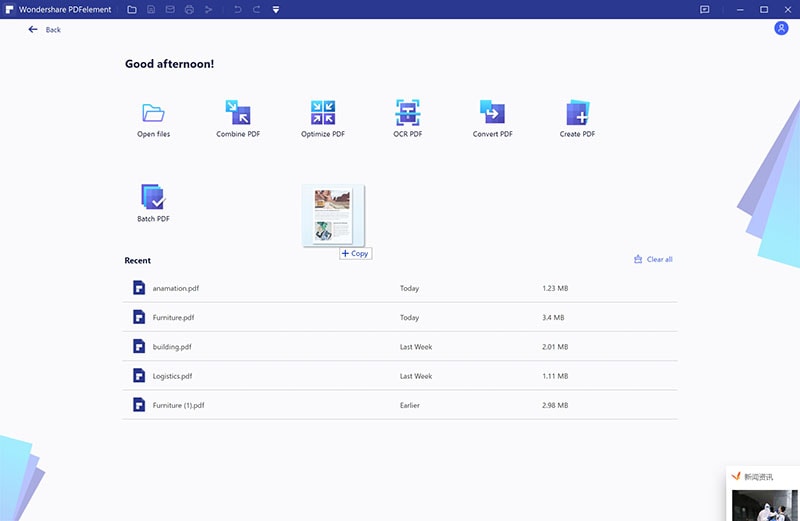
Step 2 Drag Screenshot into PDFelement
Open PDFelement and drag and drop the screenshot into it. Alternatively, you can also click on “Open files” to add a screenshot.
Step 3 Convert Screenshot to PDF
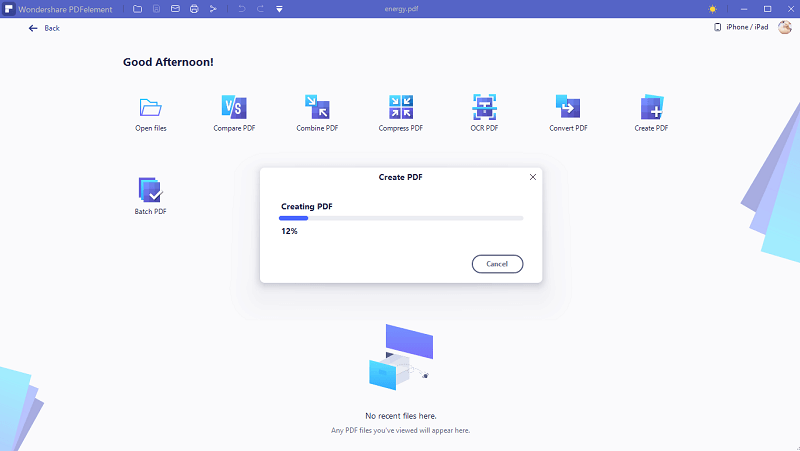
Once you drop the screenshot into PDFelement, it will automatically convert it into a PDF. You will be taken to a new interface where you will have different options to further edit the screenshot according to your needs.
Step 4 Save PDF File
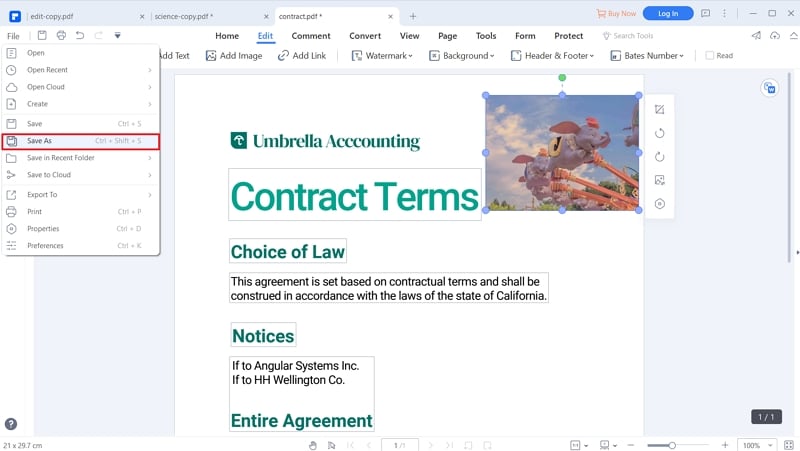
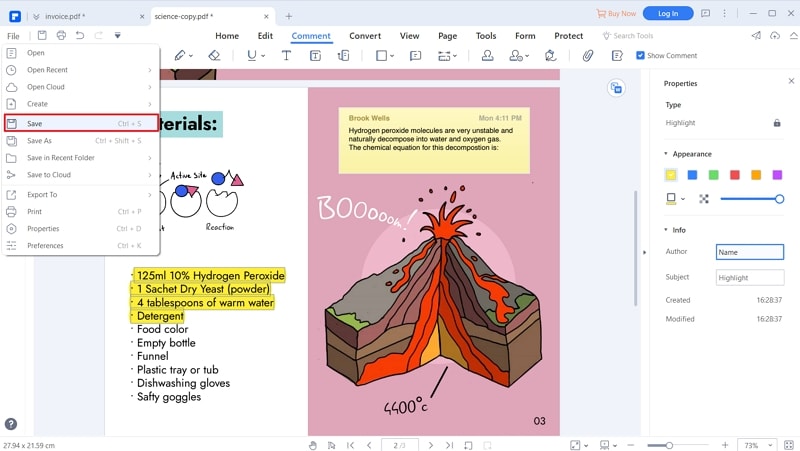
Once you are done, go to “File” and click on “Save” to save your PDF file. You can also click on “Save As” to save it with a customized name.
Alternative Method of Saving a Screenshot as a PDF
If you are looking for another method of saving your screenshot as a PDF file, follow the steps given below.
Step 1 Open the Screenshot
Click on the screenshot in order to open it.
Step 2 Click on Print
In the top right corner, you will see a printer icon. Click on it to go to print settings. Alternatively, you can also press Ctrl+P.
Step 3 Select the Printer
On the left of the screen, you have the option to select the printer. Here, set Wondershare PDFelement as the printer.
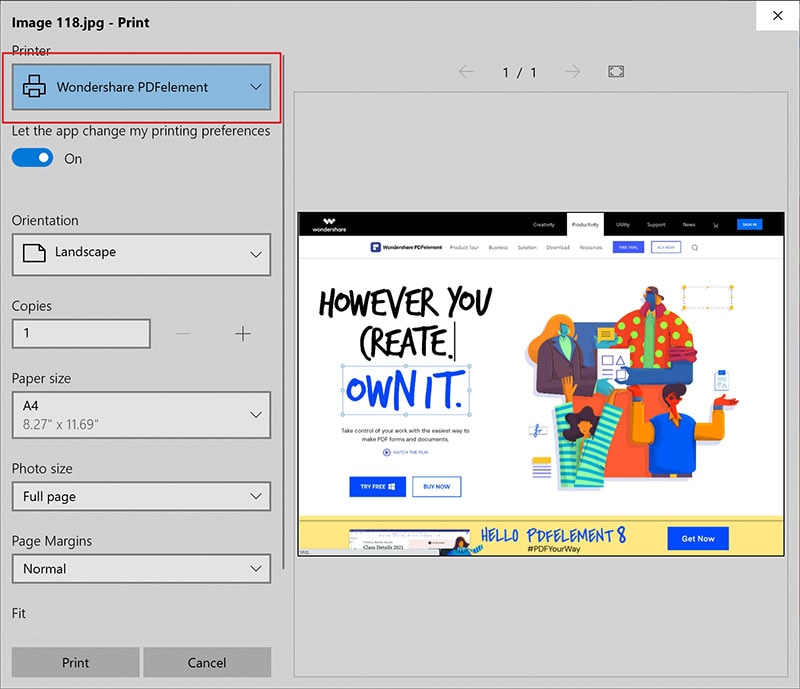
Step 4 Click on “Print”
Once you are done, click on “Print.” PDFelement will open up, and you will be able to view your screenshot in PDF format. You can edit the screenshot using the different features that PDFelement offers.
Step 5 Save As PDF
Once everything is set according to your need, go to “File” and click on “Save As” to save the file with a customized name.
