This article takes you through a suitable way to combine scanned documents into one PDF with the best tool - PDFelement.
Scanning documents makes it easier to convert, share and save your paperwork on the computer. However, having multiple scanned PDFs as separate files can be inconvenient, especially if you want to share or view them individually. It is crystal clear that it not only consumes both time and energy but also takes more space in your computer. Therefore, the only way to disentangle yourself from this inconvenience is to know how to combine scanned documents into one PDF. Fortunately, this article gives you a clear guide on how to merge scanned documents into one PDF.
How to Put Scanned Documents into One PDF
How to Combine Scanned Documents into one PDF
Way 1. Combine Scanned Documents into One PDF with PDFelement
PDFelement is the best all-in-one PDF software used by millions of people, companies, and organizations globally. The amazing collection of top-notch features, ease of use, elegant interface, fast speed, outstanding compatibility, and affordability makes it a top choice for many people. The key features of PDFelement include print, annotating, editing, converting, creating, protecting, organizing, sharing, and performing PDF OCR. Furthermore, you can create and edit forms on PDFelement.
PDFelement offers one of the easiest ways to combine scanned documents into one PDF, as shown below.
Step 1 Launch PDFelement
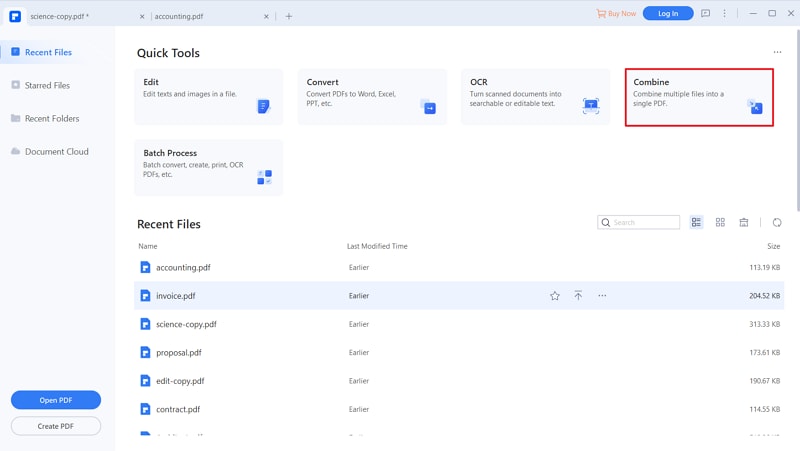
Download and install PDFelement on your computer. Proceed to launch it and hit the “Combine PDF” tab on the interface.
Step 2 Choose Scanned Documents
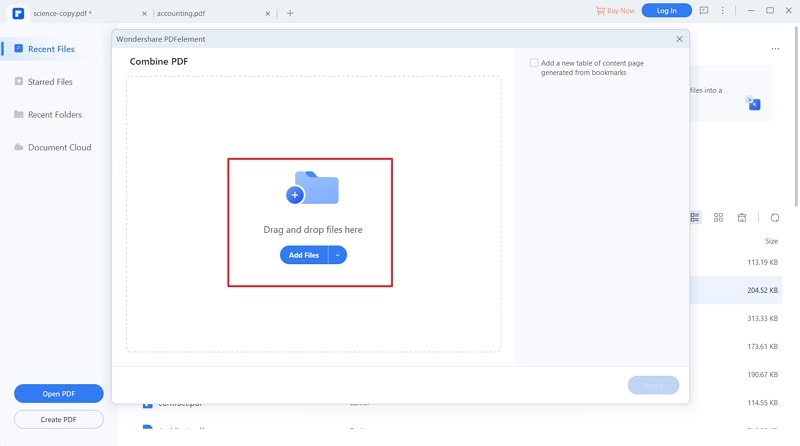
Upon hitting the tab, the program will display the “Combine PDF” window on the screen. Click the “Choose file” button to access the file explorer window. Select the scanned documents that you want to convert into one PDF. When you have selected the desired scanned documents, click the “Open” button to upload your scanned files to the PDFelement interface.
Step 3 Merge Scanned Documents into one PDF
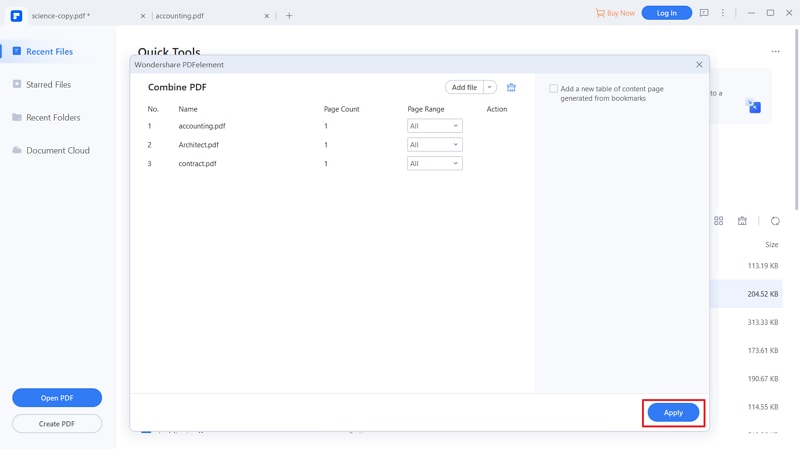
When the files are successfully uploaded, you should see the name and other details on this window. Now go to the bottom-left of this same window. Under the “Output Folder” section, click the browse icon to open the file directory window and choose the target output folder. Finally, hit the “Apply” button to allow the program to combine scanned documents into one PDF. You can monitor the process in the background.
Step 4 OCR and Edit PDF (Optional)
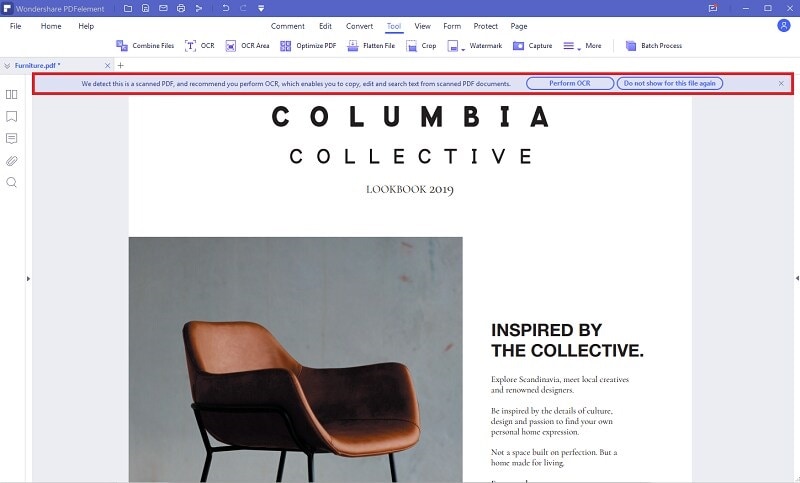
PDFelement will open your combined PDF file on the interface when the process is done. You can now choose to edit the PDF file. However, this process is optional. If you want to perform OCR and edit your scanned file, simply hit the “Perform OCR” and follow the subsequent on-screen instructions. Remember to hit the “Save” button to save the changes you have made to your PDF document.
Way 2. Combine Scanned Documents into One PDF with Adobe Acrobat
Adobe Acrobat is a pioneer in the PDF industry and easily becomes a good tool for merging scanned documents into one PDF. With Adobe Acrobat, you can merge different file formats into a single PDF file. These formats include spreadsheets, Word, Excel, PPT, and image files. Before merging your files, you can decide to organize them to meet your needs by deleting unwanted pages, rotating, or sorting them. If you want to merge scanned documents into one PDF using Adobe Acrobat, follow the steps below.
Step 1. On your computer, launch Adobe Acrobat DC then navigate to the “Tools” section and choose the “Combine Files” option.
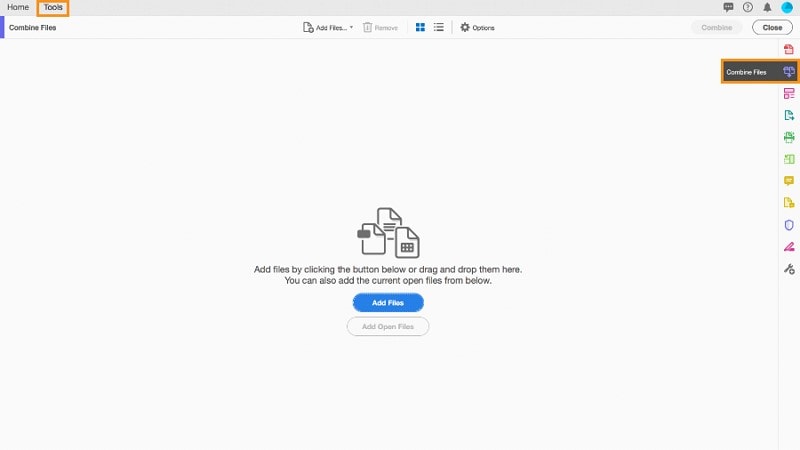
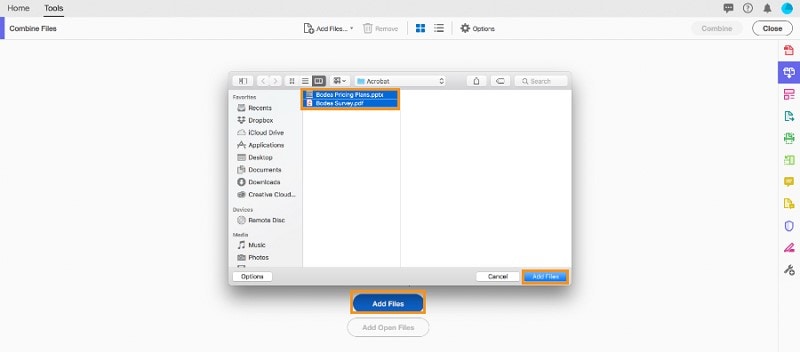
Step 2. On the interface, click the “Add Files” button and proceed to add the target scanned documents.
Step 3. With the scanned documents now added, proceed to arrange your documents as per your need. You can delete or reorder files to meet your needs.
Step 4. When you are done arranging your files, hit the “Combine Files” button to trigger the process.
Step 5. When the program has completed merging your scanned documents, click “Save” to save your newly merged PDF file.
Way 2. Combine Scanned Documents into One PDF Online
PDF2Go is a free online PDF tool that allows users to easily merge multiple scanned documents into a single PDF file. This program supports different file formats, such as images to be merged into a PDF file. With this program, you can source your input files from Dropbox, the local computer, Google Drive, and a URL link. The interface is straightforward, and newbies will navigate with ease. The following steps show how to easily merge scanned documents into one PDF with PDF2Go
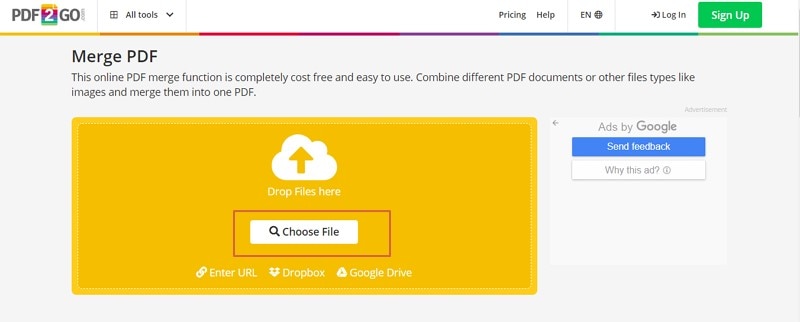
Step 1. Open PDF2Go to merge scanned documents into one PDF page on your browser.
Step 2. Choose a suitable option to upload your PDF files. You can drag and drop or hit the “Choose File” button.
Step 3. When the scanned PDFs are uploaded, you can now choose to sort them if you like. You can choose the ascending or descending order by clicking the respective buttons. However, this step is not mandatory.
Step 4. When you are satisfied with your selections, click the “Save As” drop-down icon and choose “Save.” The processing will commence immediately.
Step 5. Click the “Download” button to fetch your merged PDF file when it is done.
