In this article, you get a complete guide on how to compress PDF to a smaller size using the right tool - PDFelement.
People compress PDFs to a smaller size because it is easier to share or store smaller files. However, you ought to be careful because you don’t want to downgrade the quality of your PDF file while trying to get a smaller file. It is more serious when dealing with official or important PDF tasks that don’t give room for substandard work. Therefore, knowing the right way to compress PDF to smaller size is the game-changer. While this is true, it all goes down to the type of tool you use. This article gives you a complete guide on the best way to compress PDF to a smaller size.
How to Compress PDF to Smaller Size in 3 Ways
Compress PDF to Smaller Size in 3 Ways
Way 1. Compress PDF to Smaller Size with PDFelement
PDFelement is an excellent all-in-one PDF software specially designed to transform the way users interact with PDF files. It is equipped with amazing features ranging from basic to advanced ones. With PDFelement, you can compress, convert, create, edit, annotate, print, protect, share, and perform OCR. The beauty of PDFelement is that it is fast, compatible with nearly all devices, supports any file format, and is easy to use. PDFelement is a complete PDF package because it has everything you need for your PDF tasks. You can download the free trial version and upgrade to the premium version to unlock an unmatchable experience.
PDFelement provides one of the finest platforms to compress PDF to a smaller size. The elegant interface and easy-to-follow icons make it easier for all categories of users. The program allows you to compress the files into the desired size without losing the quality of your input file. The following steps illustrate how to compress PDF to a smaller size with PDFelement.
Step 1 Choose to Compress PDF
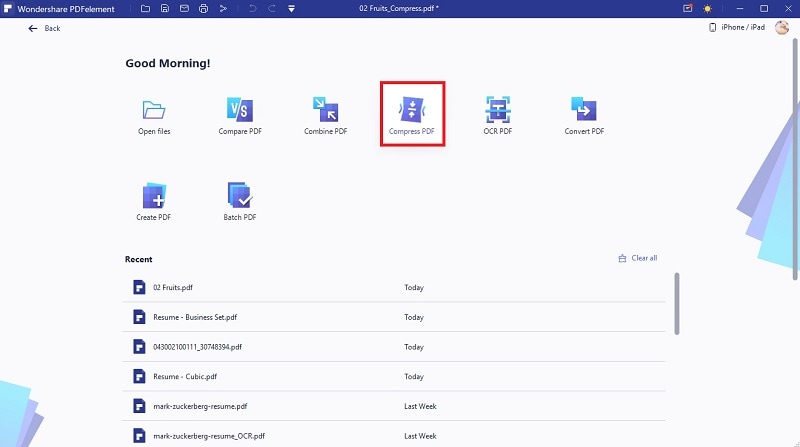
Launch PDFelement on your computer to access the main window to get started. Hit the “Compress PDF” tab to open the file explorer window.
Step 2 Add PDF Files to Compress
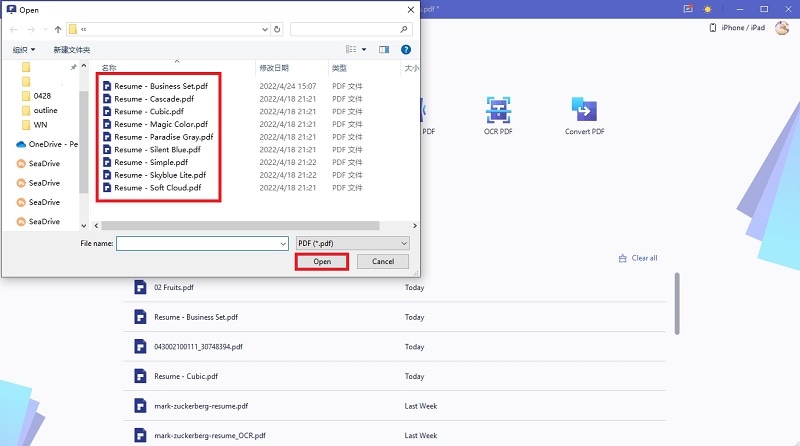
Choose the PDF file you want to compress on the file directory, then hit “Open” to upload it.
Step 3 Choose the Compression Quality
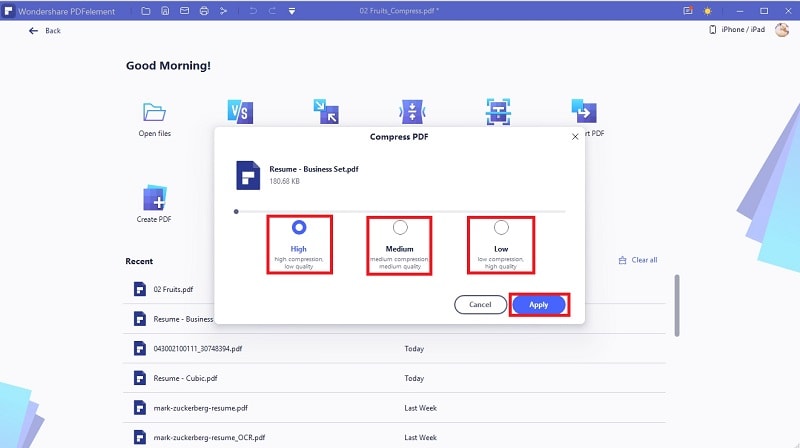
Immediately, PDFelement will display the “Compress PDF” window on the screen. Here, you are given three compression quality options. You can choose between High, Medium, and Low compression qualities. Select a suitable PDF compression quality and hit the “Apply” button to proceed.
Step 4 Open Compressed PDF File
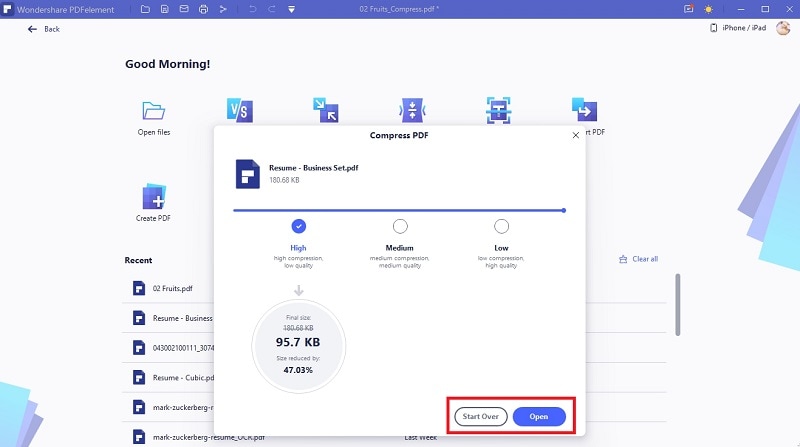
When the program has completed compressing your file, you should see two options, namely “Start Over” and “Open.” If you want to change the compression quality, you can hit the “Start Over” option and repeat the process. Otherwise, hit the “Open” button to open your compressed PDF file on PDFelement.
Step 5 Save Compressed PDF File
Finally, you need to save your new PDF file so that it is not discarded when you exit the PDFelement window. This is easy. Just go to the “File” section and choose the “Save” option. Your file is now saved.
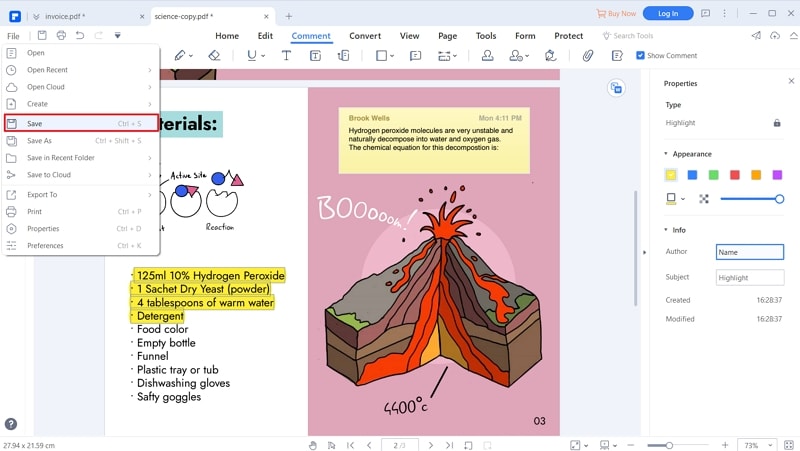
And this is how you compress PDF with PDFelement. The process is fast, simple, and convenient. You can convert bulk files with speed and ease without quality loss. Good luck with your PDF compression.
Way 2. Compress PDF Files to Smaller Size with Adobe Acrobat Online
Adobe Acrobat offers one of the most reliable ways to compress PDF to smaller sizes. This program reduces the size of your PDF with any web browser, including the popular ones like Google Chrome. The good thing with Adobe Acrobat is that the quality of your PDF file remains unchanged. You can compress the file size of up to 2 GB with Adobe Acrobat online platform.
Step 1. Using your browser, navigate to Adobe online compress PDF to a smaller size page.
Step 2. Locate and click the “Select a file” button to access the file explorer window. Choose the PDF file you want to compress and hit the “Open” button.
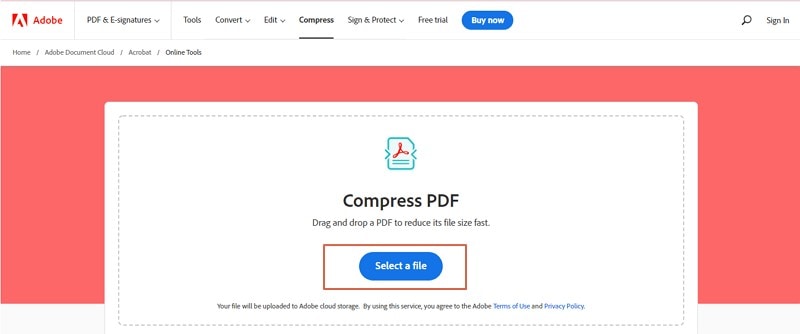
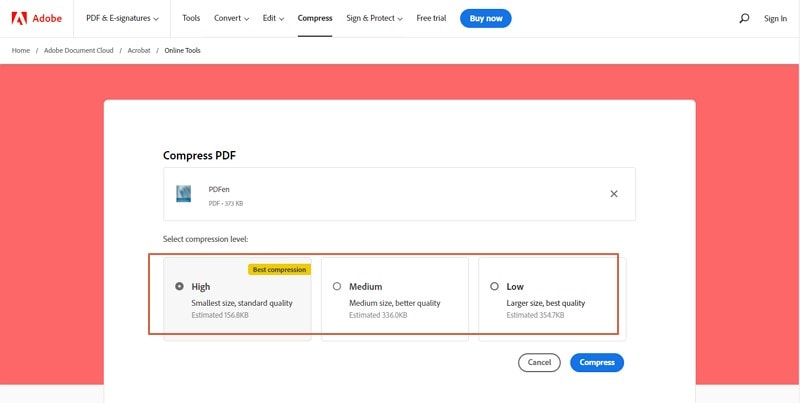
Step 3. When the selected PDF is uploaded successfully, click the “Select Compression level” drop-down arrow and select the desired compression quality. You can choose High, Medium, or Low, depending on your needs.
Step 4. When you are satisfied with your selections, click the “Compress” button to trigger the compression process. You can monitor the process in the background.
Step 5. Hit the “Download” button to download your compressed PDF file when the compression process is done.
Way 3. Compress PDF to Smaller Size with SmallPDF
SmallPDF is one of the finest online tools to compress PDFs to a smaller size. This program is browser-based and runs on nearly all Windows, Mac, and Linux platforms. SmallPDF is easy to use and guarantees security. When you upload a file for processing, it is automatically deleted from the SmallPDF servers after one hour. This makes it hard for your file to be accessed by hackers or unauthorized people. With this program, you can compress your scanned PDF to 144 dpi. This is perfect quality, especially if you want to share your files via the web or email. Unlike most online tools, SmallPDF offers a higher file size limit of 5 GB!
Step 1. Use your browser to access SmallPDF compress PDF to smaller size page.
Step 2. Click the “CHOOSE FILES” button and choose the PDF file you want to compress from the subsequent file explorer window. Click “Open” to upload. Alternatively, drag the PDF file and drop it on the “drop files here” section of the program.
Step 3. When the files are uploaded, you will be prompted to choose your desired compression quality. You can choose between the “Basic Compression” or “Strong Compression” options.
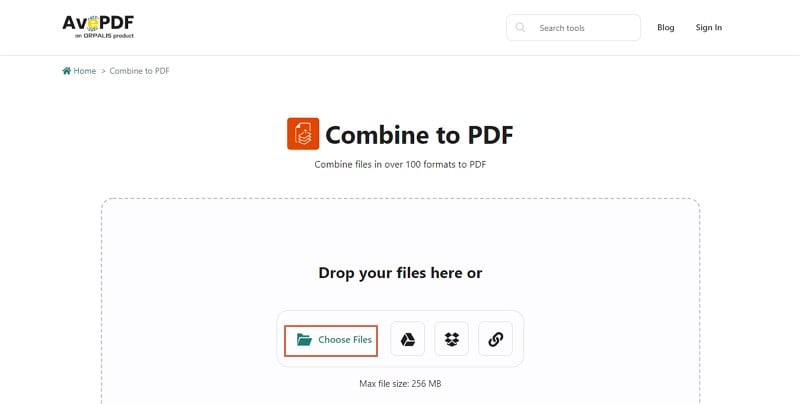
Step 4. After choosing the desired compression quality, hit “Compress” to initiate the process.
Step 5. When the process is completed, click the “Download” button to fetch your compressed PDF file.


